[et_pb_section admin_label=”section”][et_pb_row admin_label=”row”][et_pb_column type=”4_4″][/et_pb_column][/et_pb_row][et_pb_row admin_label=”row”][et_pb_column type=”4_4″][et_pb_text admin_label=”Text” background_layout=”light” text_orientation=”left” text_font_size=”14″ use_border_color=”off” border_color=”#ffffff” border_style=”solid”]
101 Mold Removal Tips
This project is meant to serve as a guide for anyone who has experienced water damage and mold inside their building. The methods seen here are just recommendations, and your specific mold removal specialist may choose to do things different. Use descretion when deciding what is best for you. Check local resources such as the EPA, NY Guidelines, Los Angeles Guide to Mold Remediation in Commercial buildings and schools.
[/et_pb_text][/et_pb_column][/et_pb_row][et_pb_row admin_label=”Row”][et_pb_column type=”1_2″][et_pb_text admin_label=”Text” background_layout=”light” text_orientation=”left” text_font_size=”14″ use_border_color=”off” border_color=”#ffffff” border_style=”solid”]
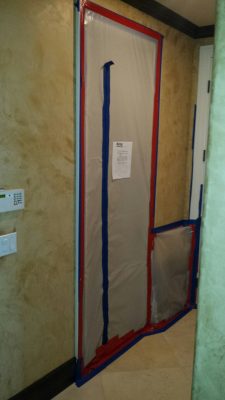
Containment for mold removal
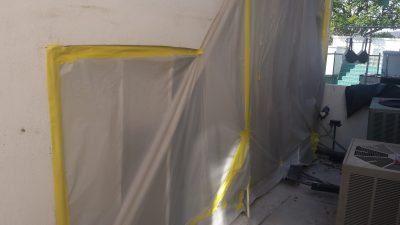
A containment should be established before removing moldly building materials over 10 sq. feet. The containment serves as a barrier and isolates the work zone from the remaining indoor environment.
Note: Containments can be established in a number of ways. Be proactive in securing your tape to the walls with adhesive or staples.
Book Your Appointment Today!
[/et_pb_text][/et_pb_column][et_pb_column type=”1_2″][et_pb_image admin_label=”Image” src=”https://funguyinspections.com/wp-content/uploads/2012/11/20151106_162512_resized-e1485670422197.jpg” alt=”cover the flooring with plastic – mold removal” show_in_lightbox=”off” url_new_window=”off” animation=”left” sticky=”off” align=”left” force_fullwidth=”off” always_center_on_mobile=”on” use_border_color=”off” border_color=”#ffffff” border_style=”solid”] [/et_pb_image][/et_pb_column][/et_pb_row][et_pb_row admin_label=”Row”][et_pb_column type=”1_2″][et_pb_text admin_label=”Text” background_layout=”light” text_orientation=”left” text_font_size=”14″ use_border_color=”off” border_color=”#ffffff” border_style=”solid”]
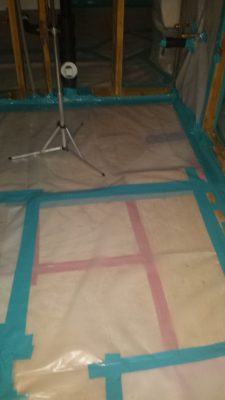
Cover the flooring
Mold removal techniques involve the demolition of building materials – drywall and plaster. Cover the flooring to protect the finished flooring within your work zone.
Note: Not all flooring has to be covered. Some mold removal companies will wipe the surfaces of the floor with an approved anitmicrobial solution before laying plastic on the floor.
[/et_pb_text][/et_pb_column][et_pb_column type=”1_2″][et_pb_image admin_label=”Image” src=”https://funguyinspections.com/wp-content/uploads/2017/01/20160102_094738-e1485671827924.jpg” alt=”cover the flooring with plastic – mold removal” show_in_lightbox=”off” url_new_window=”off” animation=”left” sticky=”off” align=”left” force_fullwidth=”off” always_center_on_mobile=”on” use_border_color=”off” border_color=”#ffffff” border_style=”solid”] [/et_pb_image][/et_pb_column][/et_pb_row][et_pb_row admin_label=”Row”][et_pb_column type=”1_2″][et_pb_text admin_label=”Text” background_layout=”light” text_orientation=”left” text_font_size=”14″ use_border_color=”off” border_color=”#ffffff” border_style=”solid”]
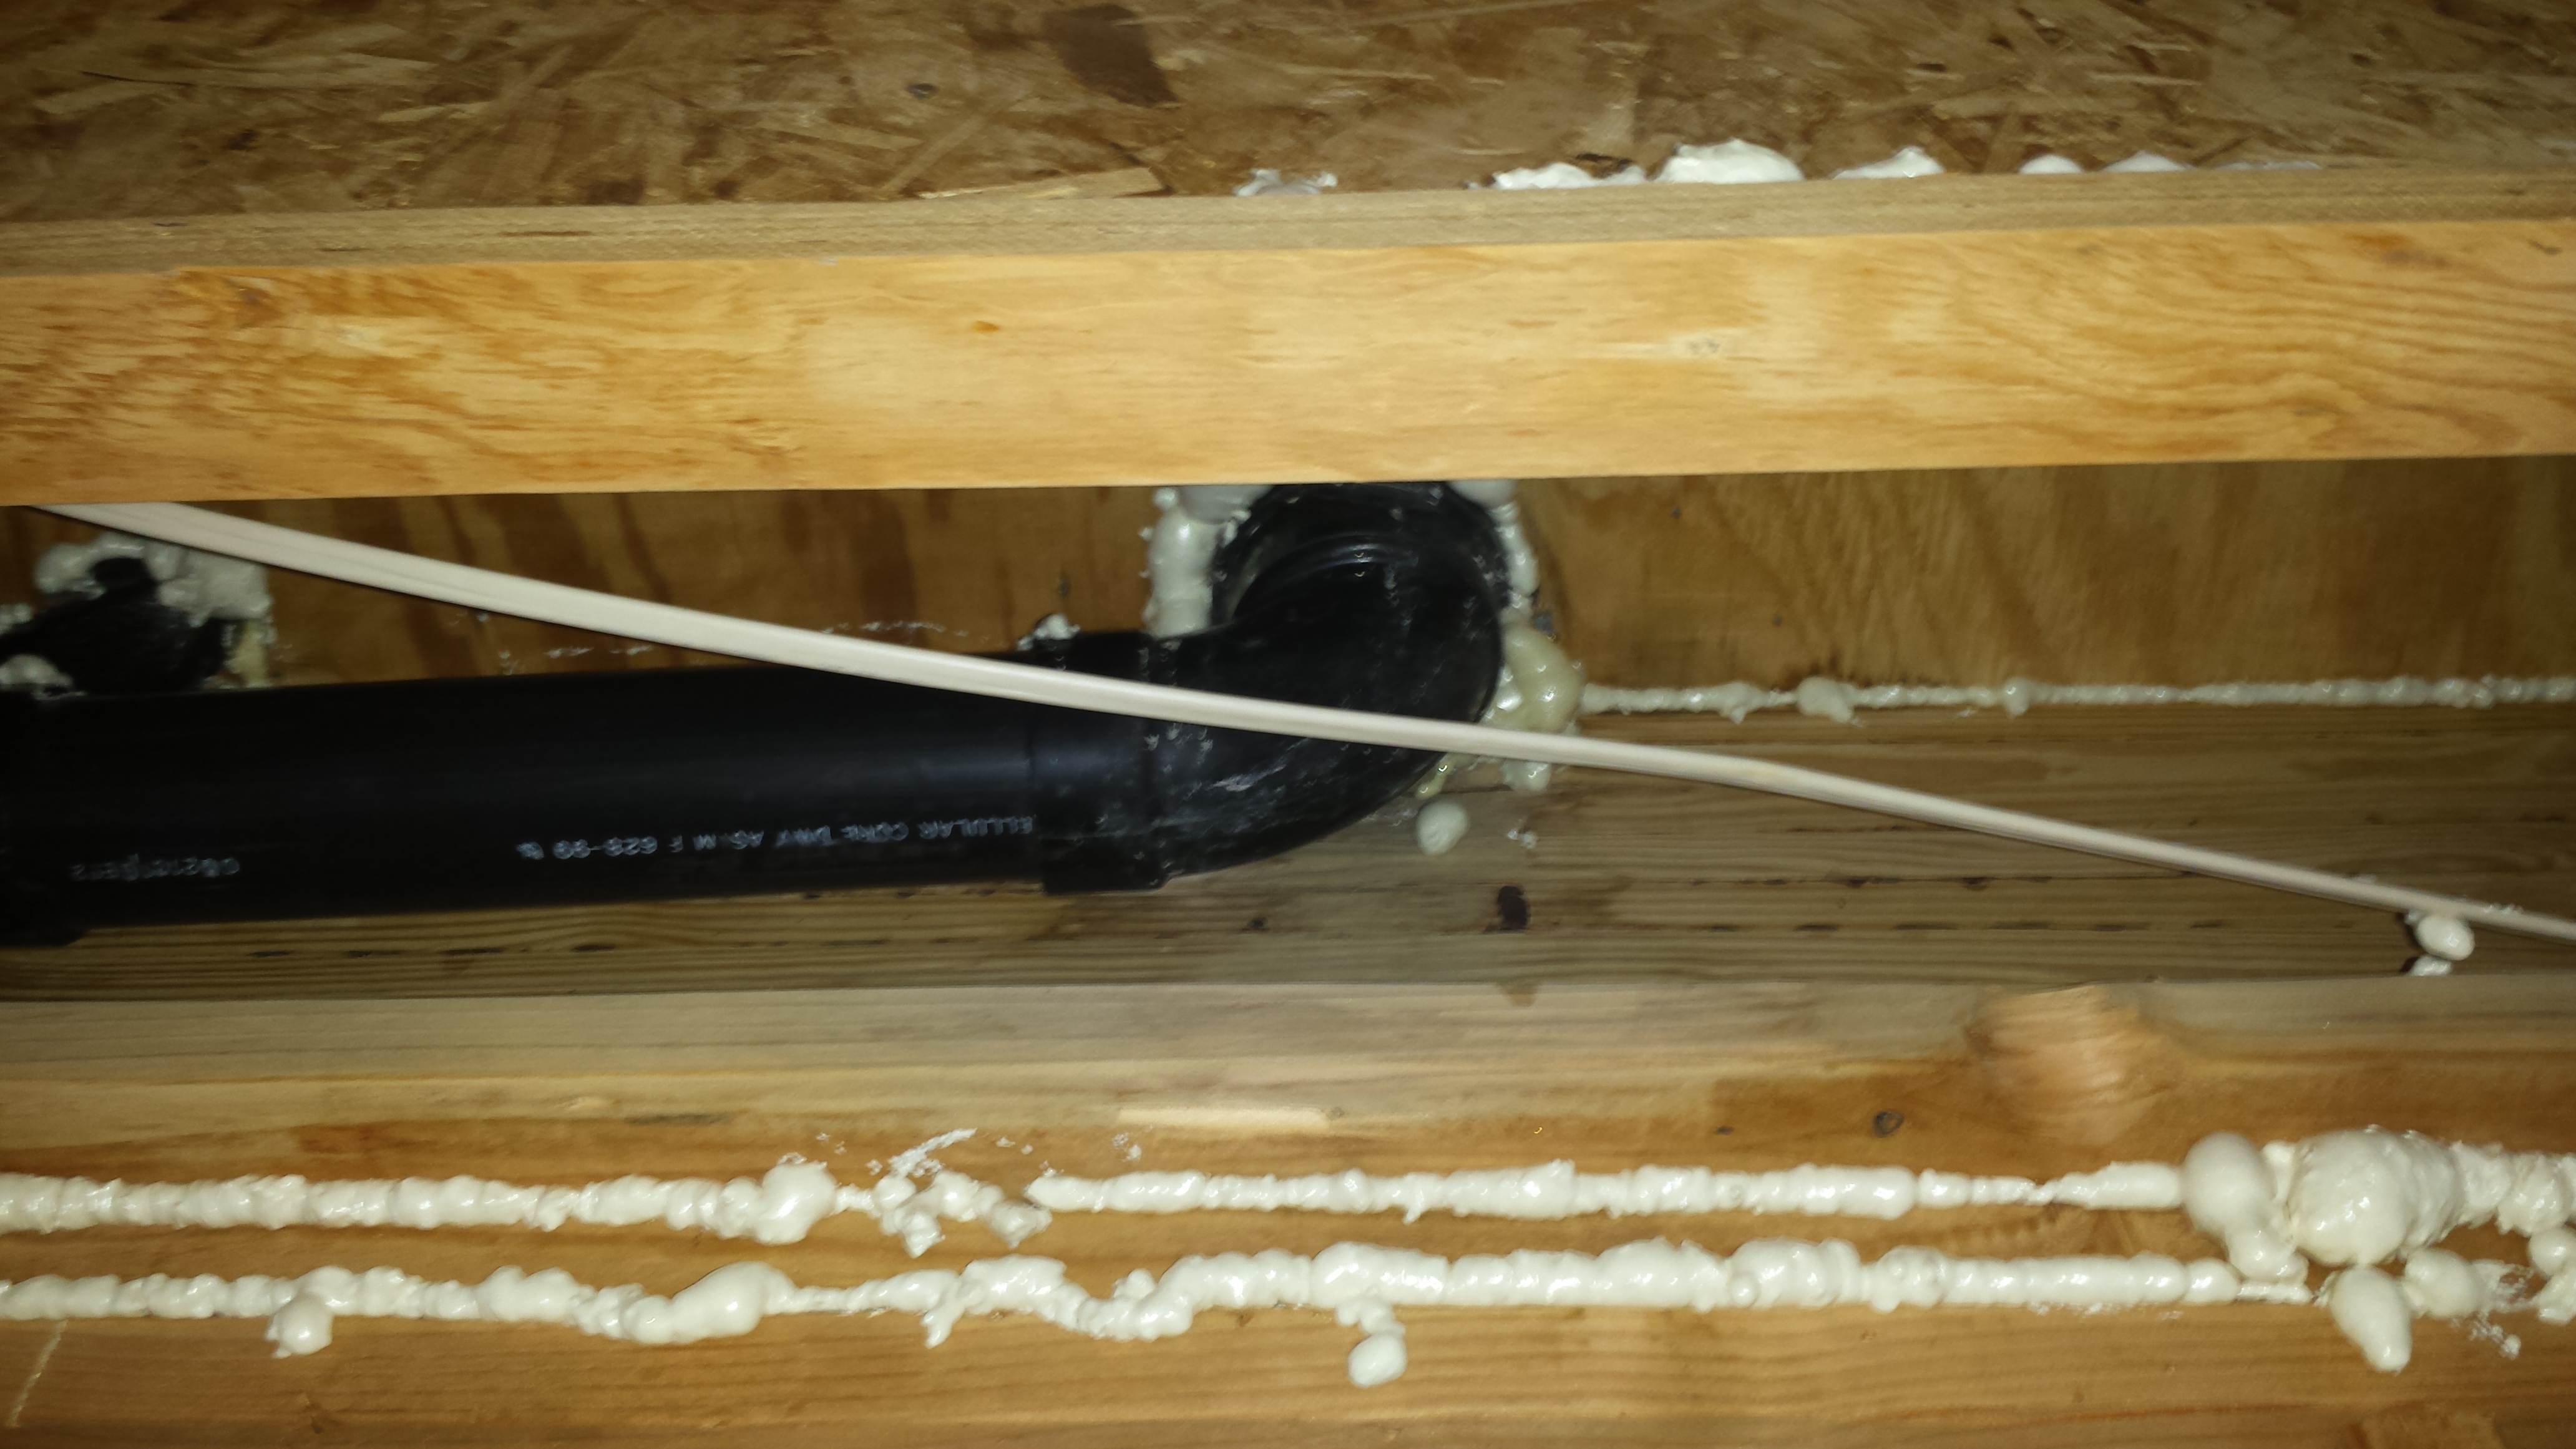
Mold Sealants
Some mold removal specialist will use foam or silicone sealants to fill gaps in between the building materials. Filling the gaps in these areas will help prevent air, from exterior sources, intruding into the enclosure.
Note: Try to use these materials sparingly. A little goes a long way.
[/et_pb_text][/et_pb_column][et_pb_column type=”1_2″][et_pb_image admin_label=”Image” src=”https://funguyinspections.com/wp-content/uploads/2017/01/20150805_161810.jpg” alt=”mold removal sealants” show_in_lightbox=”off” url_new_window=”off” animation=”left” sticky=”off” align=”left” force_fullwidth=”off” always_center_on_mobile=”on” use_border_color=”off” border_color=”#ffffff” border_style=”solid”] [/et_pb_image][/et_pb_column][/et_pb_row][et_pb_row admin_label=”Row”][et_pb_column type=”1_2″][et_pb_text admin_label=”Text” background_layout=”light” text_orientation=”left” text_font_size=”14″ use_border_color=”off” border_color=”#ffffff” border_style=”solid”]
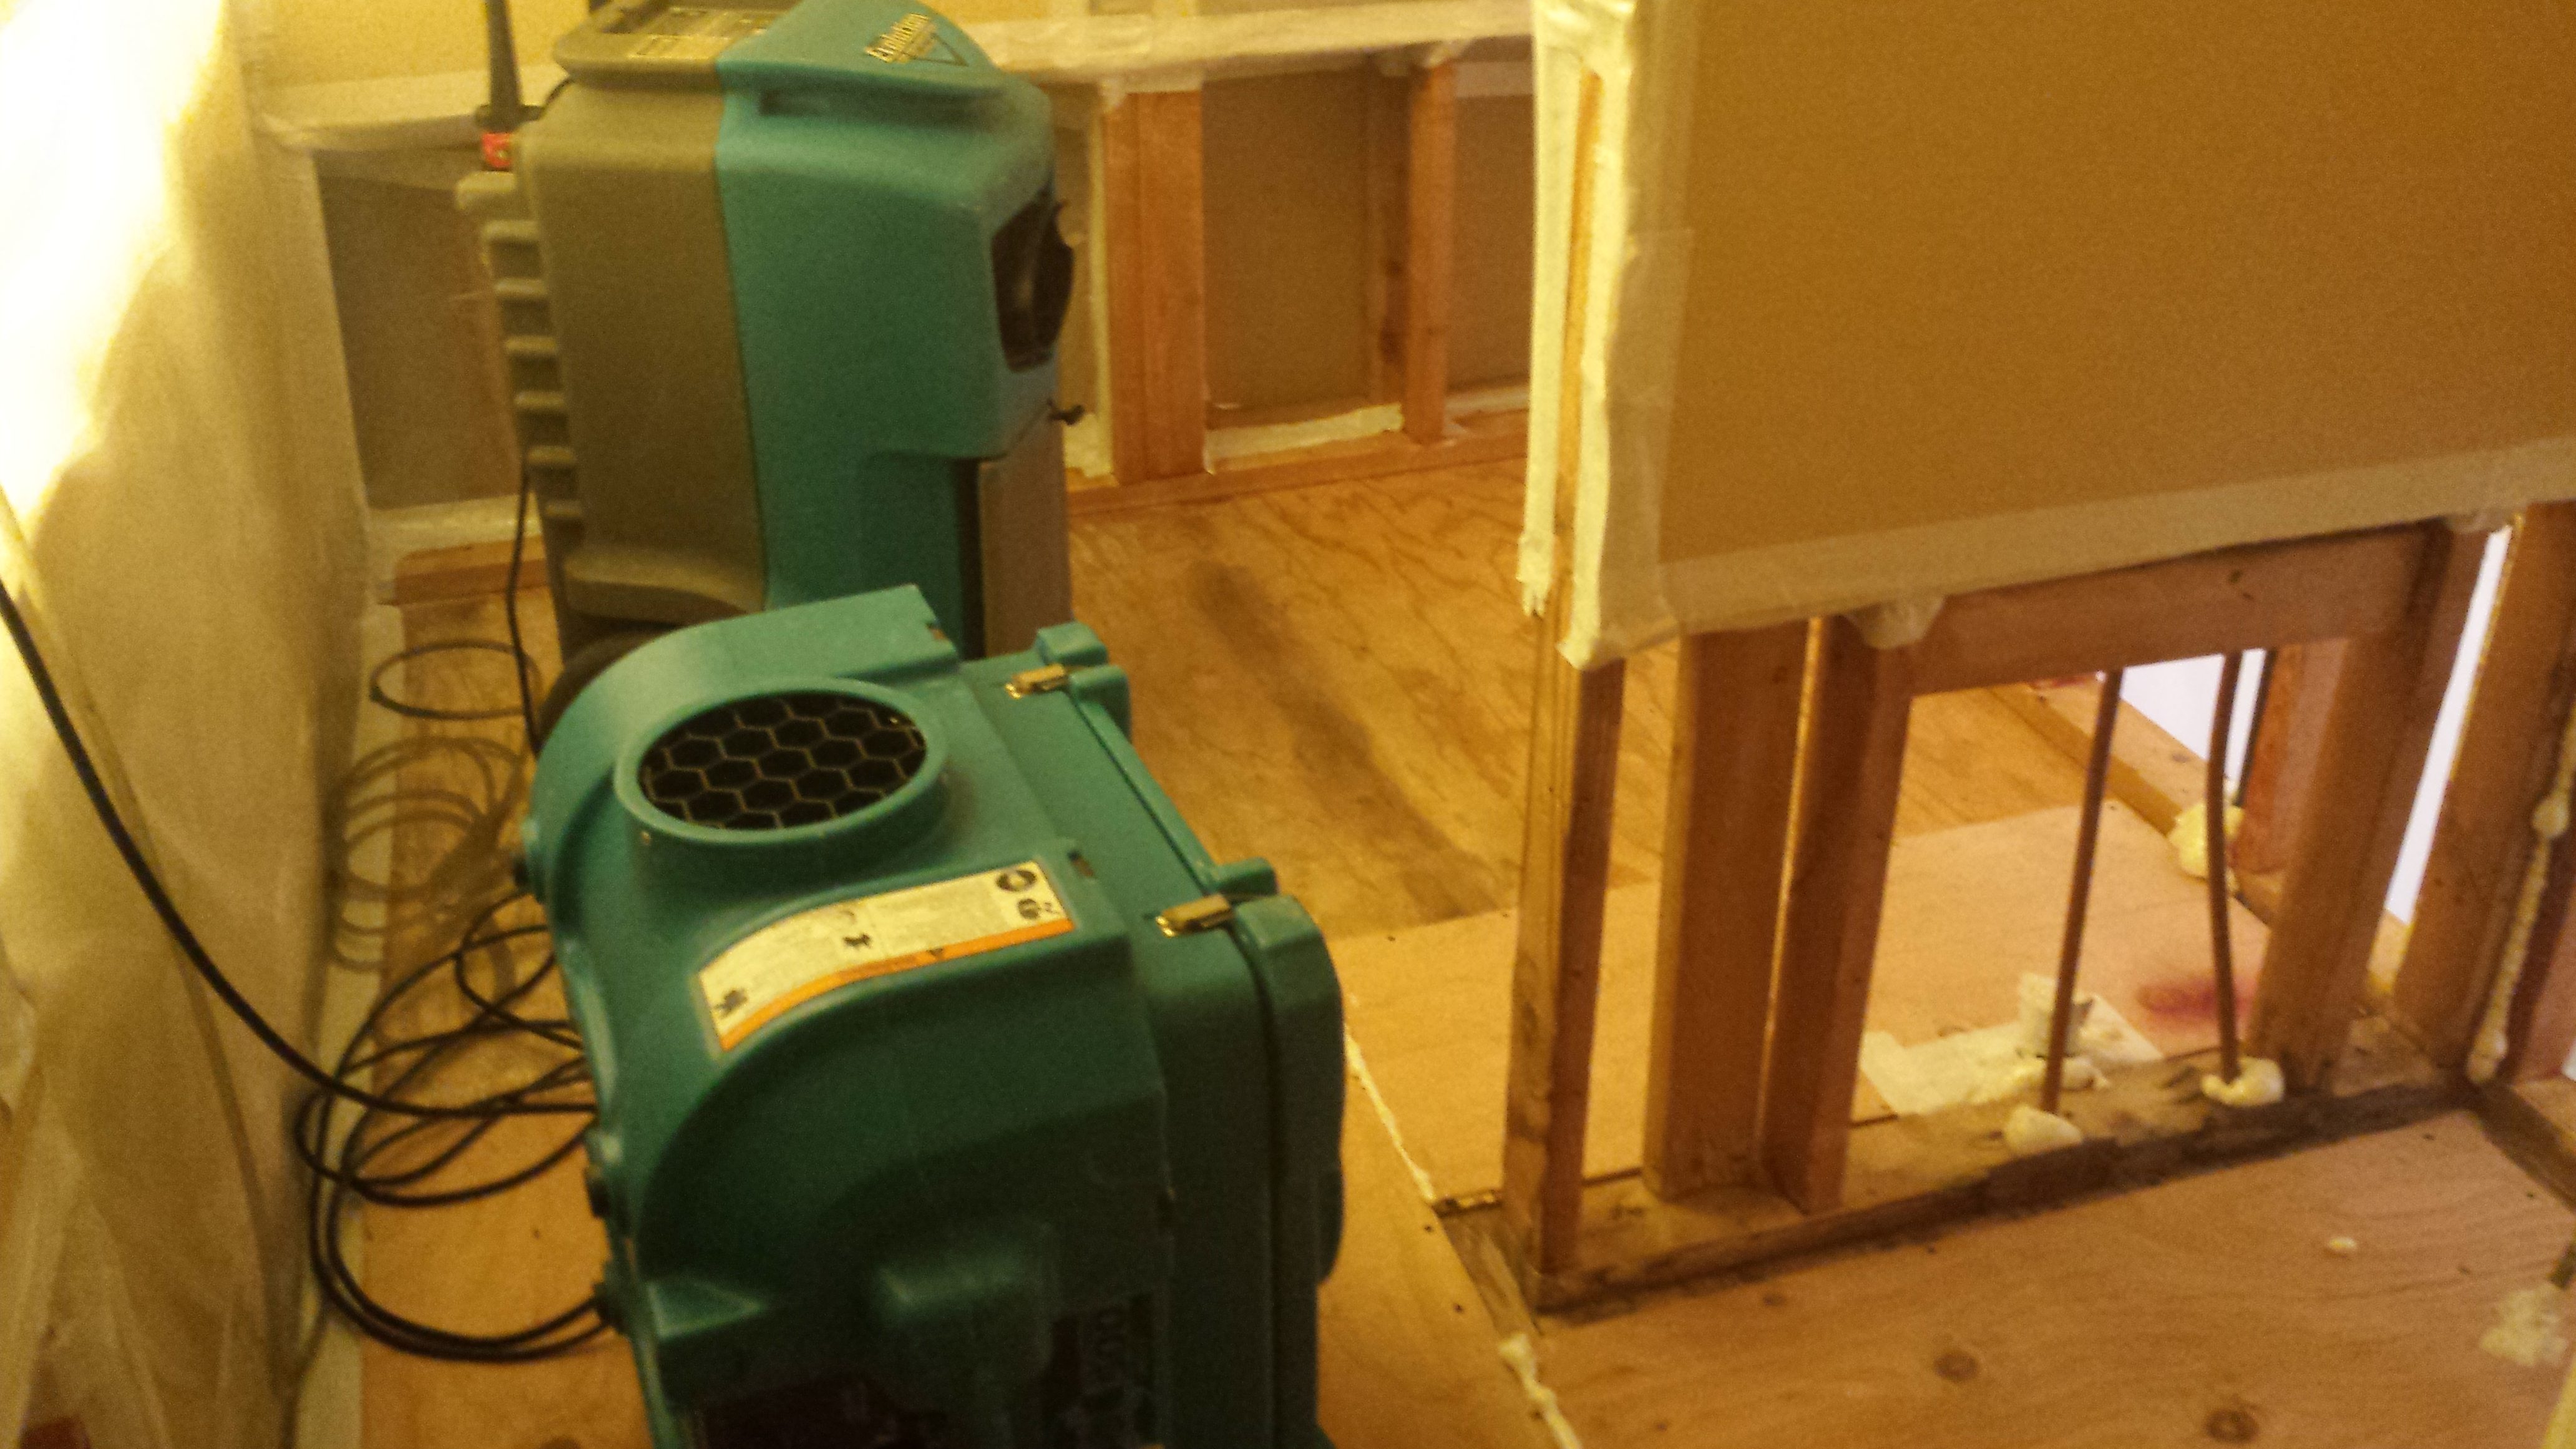
Mold Removal Machines
Mold removal experts use specialized machines that filter mold spores and particles out of the air. Mold Removal Machines are proficient at removing particles (such as mold spores) by passing the air through a HEPA filter. The efficiency of a HEPA filter is 99.9% of particles 2-200 microns.
Note: Directionality – what way do you point your negative air machine and how often do you change the filters? Mold removal machines need to be broken down, cleaned, and each filter changed prior to or after finishing your job.
[/et_pb_text][/et_pb_column][et_pb_column type=”1_2″][et_pb_image admin_label=”Image” src=”https://funguyinspections.com/wp-content/uploads/2017/01/20150810_141727-e1485408064416.jpg” alt=”mold removal sealants” show_in_lightbox=”off” url_new_window=”off” animation=”left” sticky=”off” align=”left” force_fullwidth=”on” always_center_on_mobile=”on” use_border_color=”on” border_color=”#ffffff” border_width=”15px” border_style=”solid”] [/et_pb_image][/et_pb_column][/et_pb_row][et_pb_row admin_label=”Row”][et_pb_column type=”1_2″][et_pb_text admin_label=”Text” background_layout=”light” text_orientation=”left” text_font_size=”14″ use_border_color=”off” border_color=”#ffffff” border_style=”solid”]
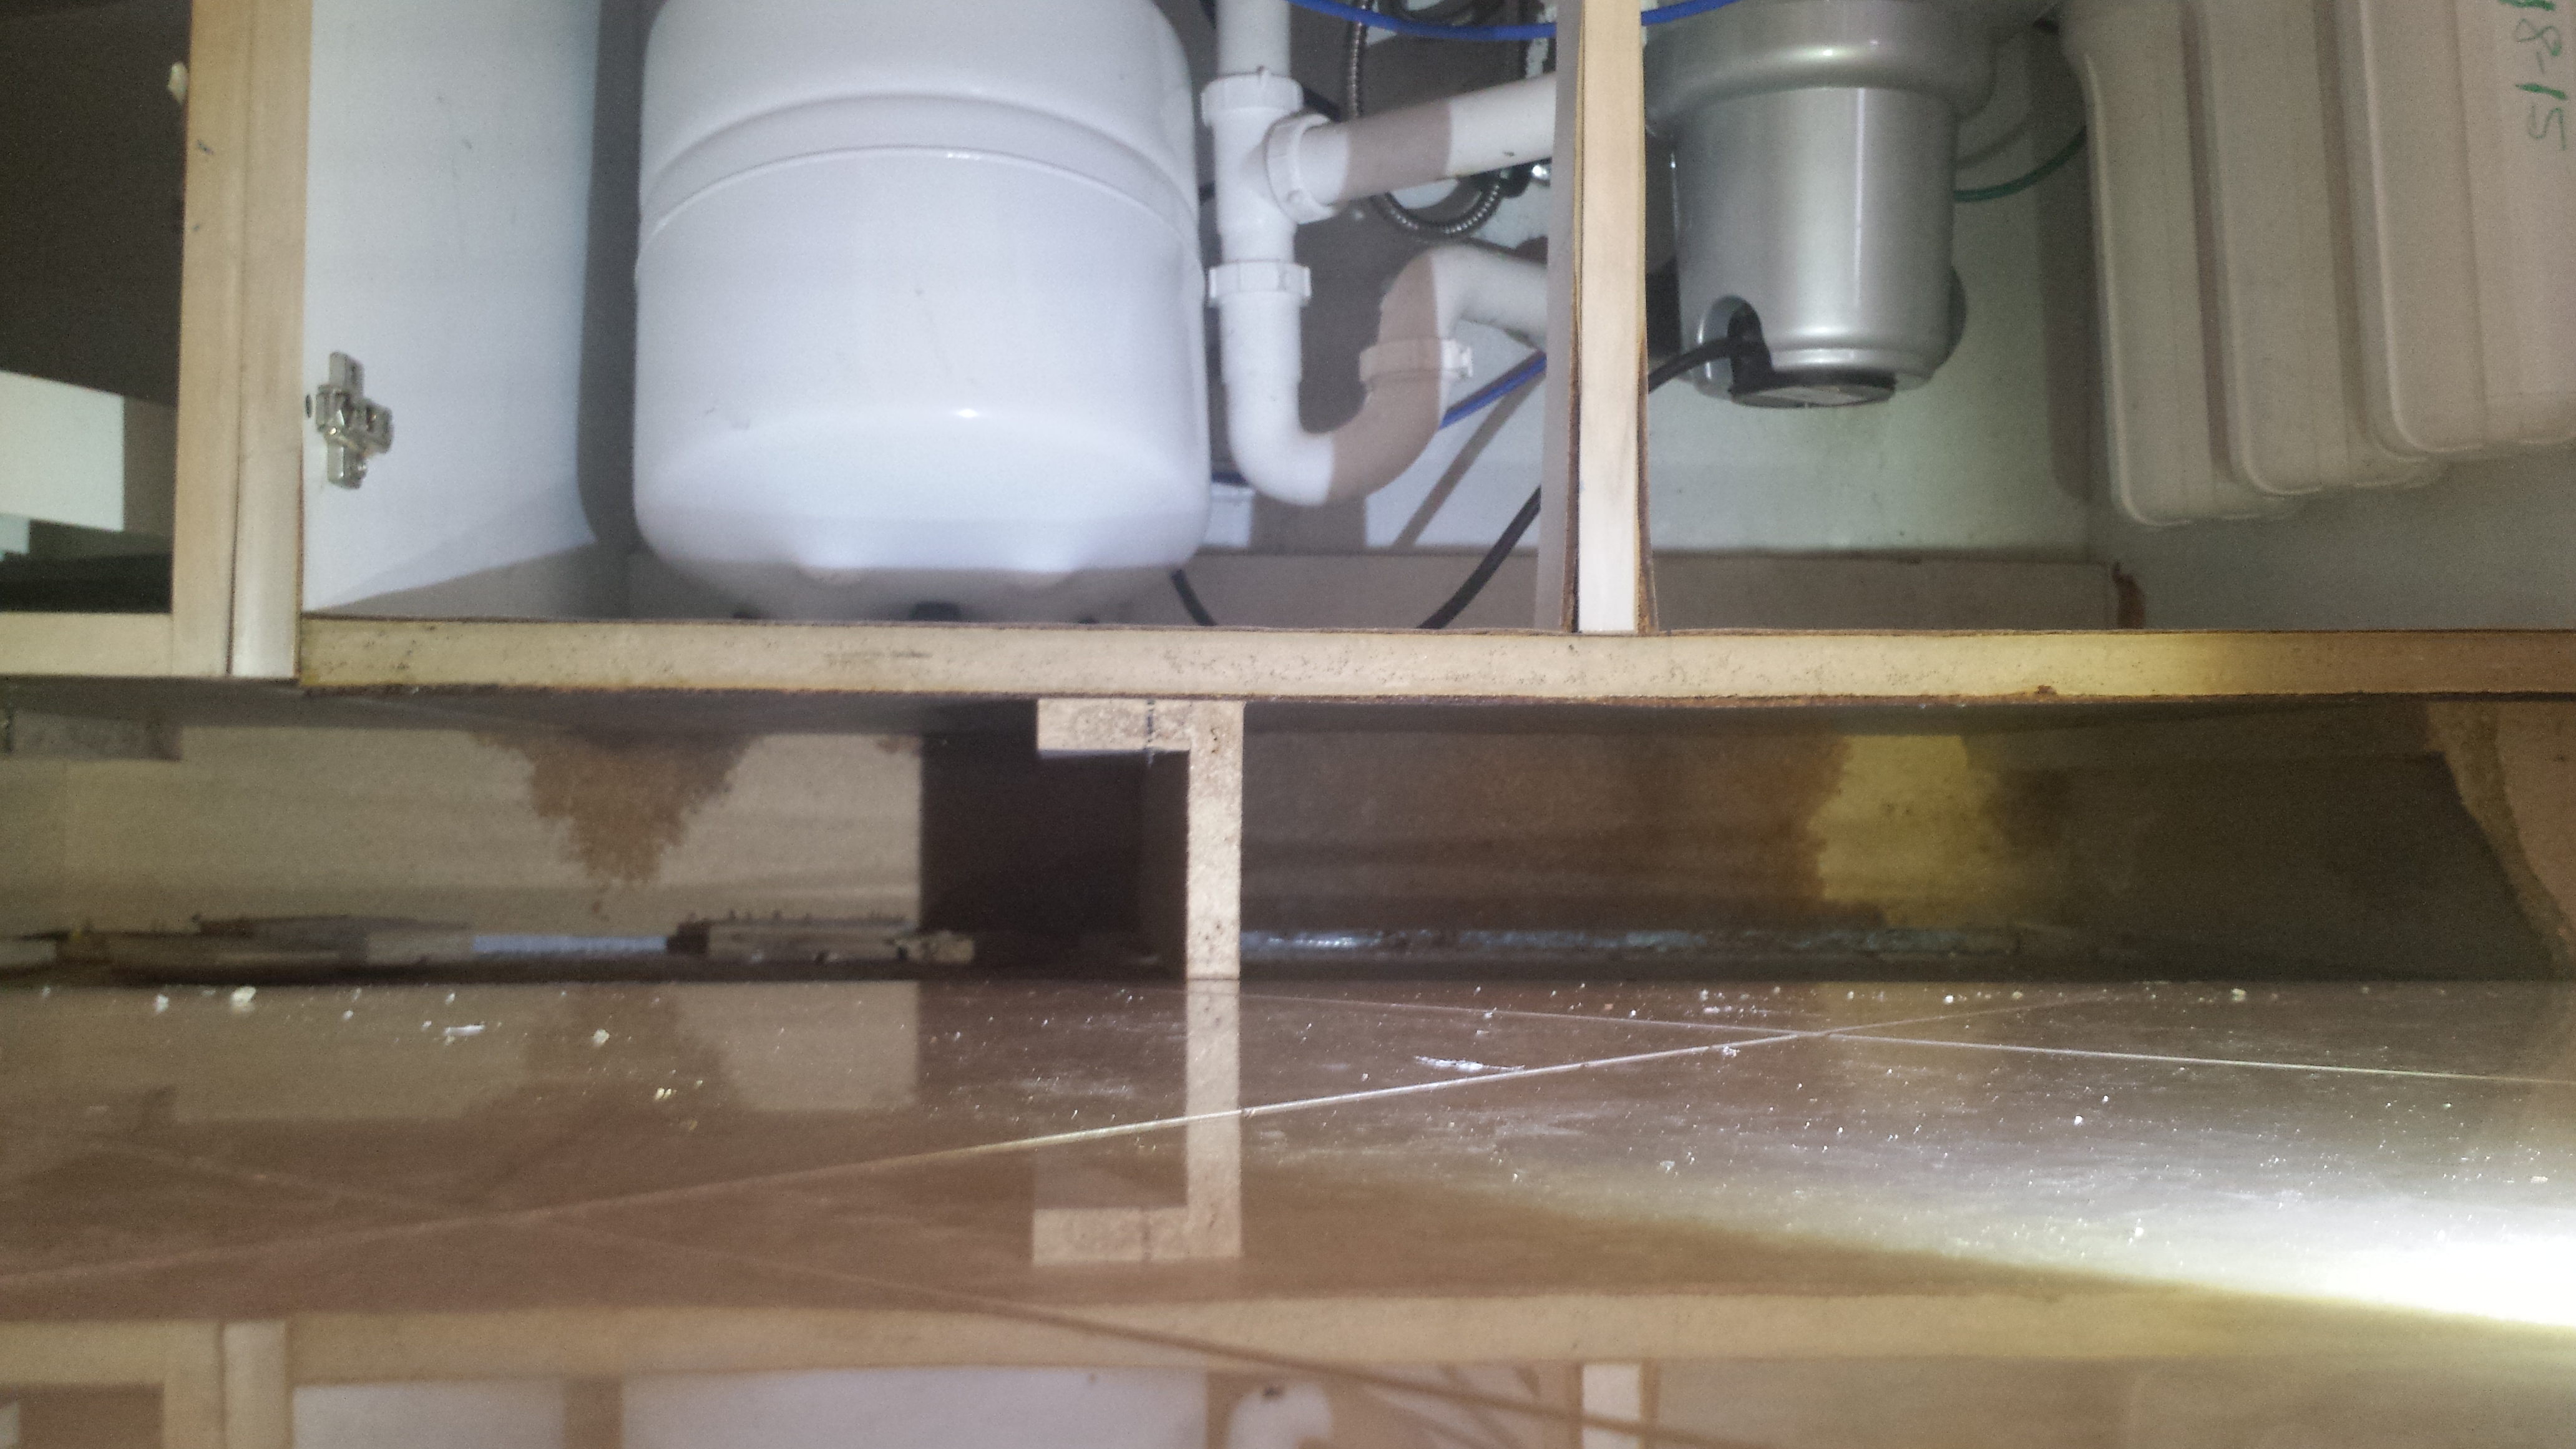
Moldy Cabinets, Particle boards, & More
Mold remediation guidelines promote removing porous materials, such as particle board, that have been impacted by moisture. From this angle, severe swelling of the building materials indicates that additional removal of the building materials is needed.
Note: When in doubt, take it out. A post remediation mold inspection may not pass due to the damage of these building materials. It is difficult to prove that mold isn’t growing in the materials.
Particle board is a composite of saw dust, wood chips, and glue press together under increased pressure and temperatures.
[/et_pb_text][/et_pb_column][et_pb_column type=”1_2″][et_pb_image admin_label=”Image” src=”https://funguyinspections.com/wp-content/uploads/2017/01/20150812_153747.jpg” alt=”mold removal sealants” show_in_lightbox=”off” url_new_window=”off” animation=”left” sticky=”off” align=”left” force_fullwidth=”on” always_center_on_mobile=”on” use_border_color=”on” border_color=”#ffffff” border_width=”15px” border_style=”solid”] [/et_pb_image][/et_pb_column][/et_pb_row][et_pb_row admin_label=”row”][et_pb_column type=”4_4″][et_pb_cta admin_label=”Call To Action” button_url=”https://funguyinspections.com/contact-us/” url_new_window=”on” button_text=”Call today!” use_background_color=”on” background_color=”#7a7a7a” background_layout=”light” text_orientation=”left” header_font_size=”26″ body_font_size=”14″ use_border_color=”off” border_color=”#ffffff” border_style=”solid” custom_button=”off” button_text_size=”20″ button_border_width=”2″ button_border_radius=”3″ button_letter_spacing=”0″ button_use_icon=”default” button_icon_placement=”right” button_on_hover=”on” button_border_radius_hover=”3″ button_letter_spacing_hover=”0″]
LEARN MORE ABOUT MOLD REMOVAL
[/et_pb_cta][/et_pb_column][/et_pb_row][et_pb_row admin_label=”Row”][et_pb_column type=”1_2″][et_pb_text admin_label=”Text” background_layout=”light” text_orientation=”left” text_font_size=”14″ use_border_color=”off” border_color=”#ffffff” border_style=”solid”]
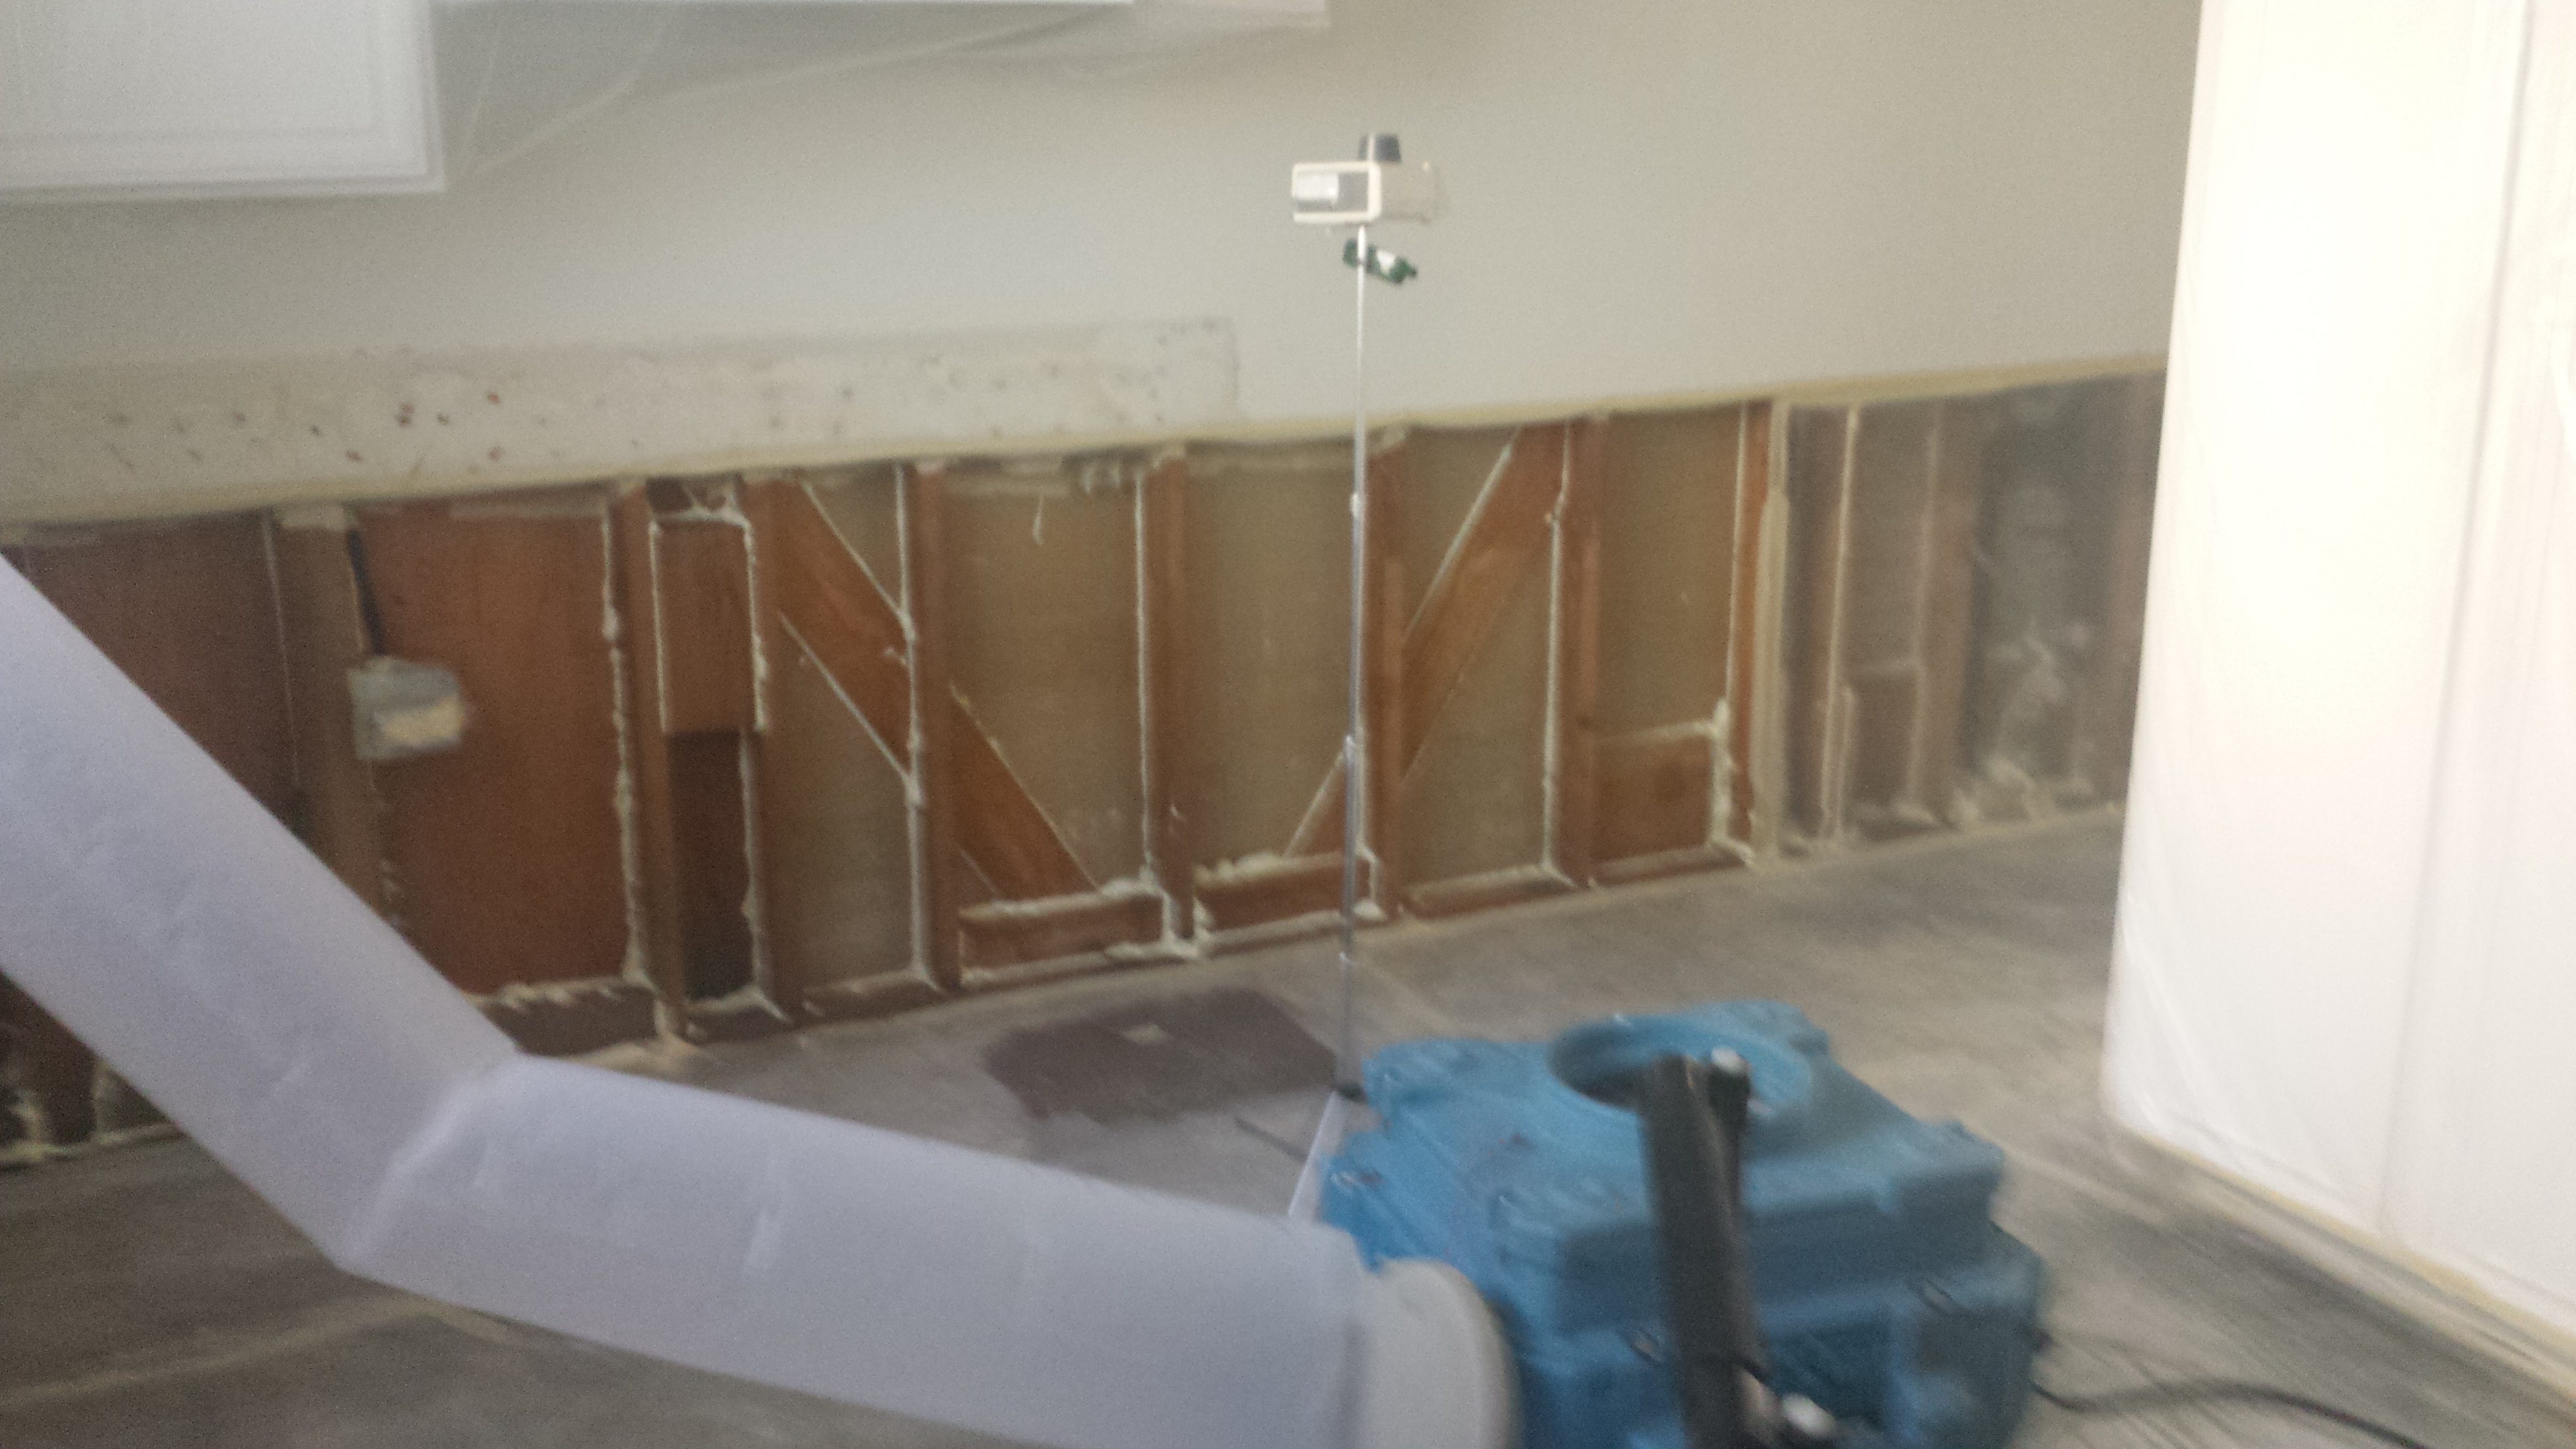
Pulling Negative Air
Mold removal companies pull negative air pressure differences to keep mold from floating in the rest of your home. The pressure allows mold removal and cleaning professionals to disturb and remove building materials from your home.
Note:Â Negative air should only be used during the phase of mold removal. Before testing, turn the machines on scrub mode and seals your existing holes in the enclosure.
[/et_pb_text][/et_pb_column][et_pb_column type=”1_2″][et_pb_image admin_label=”Image” src=”https://funguyinspections.com/wp-content/uploads/2017/01/20150925_103619-e1485410429779.jpg” alt=”mold removal sealants” show_in_lightbox=”off” url_new_window=”off” animation=”left” sticky=”off” align=”left” force_fullwidth=”on” always_center_on_mobile=”on” use_border_color=”on” border_color=”#ffffff” border_width=”15px” border_style=”solid”] [/et_pb_image][/et_pb_column][/et_pb_row][et_pb_row admin_label=”Row”][et_pb_column type=”1_2″][et_pb_text admin_label=”Text” background_layout=”light” text_orientation=”left” text_font_size=”14″ use_border_color=”off” border_color=”#ffffff” border_style=”solid”]
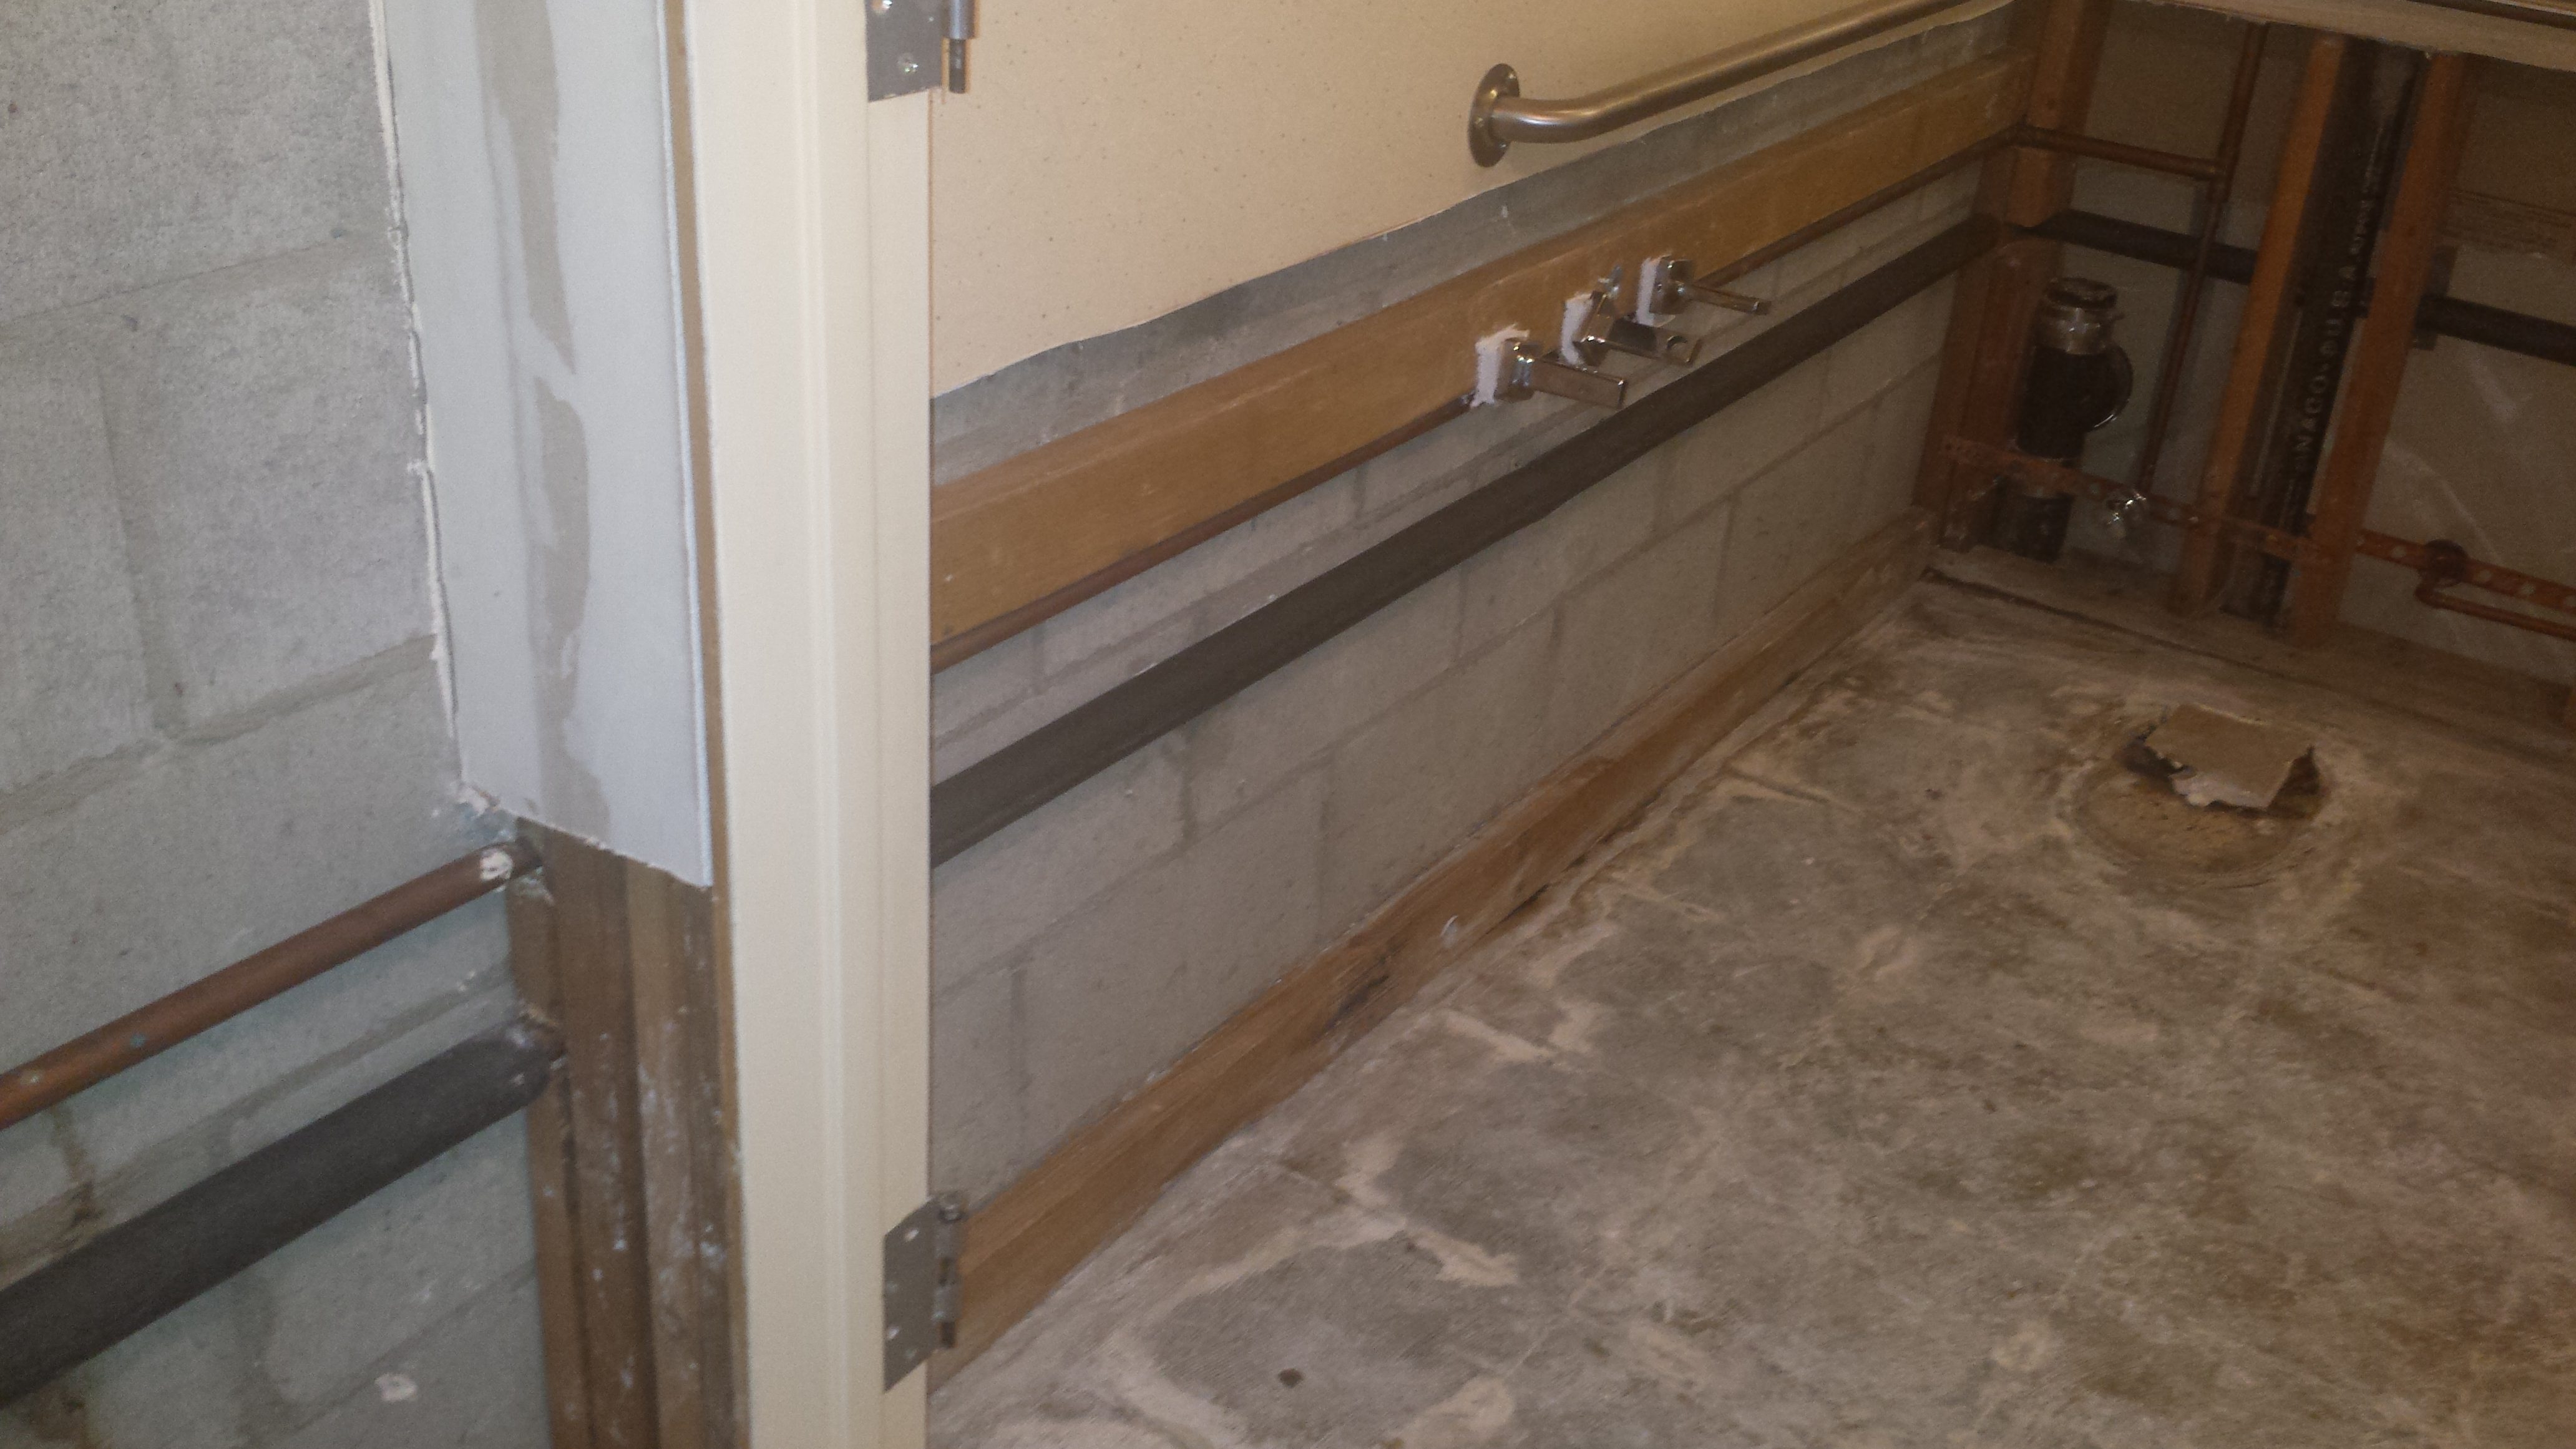
Cinder block walls
Remember that these materials are porous, but don’t usually harbor mold. Clean these areas well if mold was found growing on the building materials next to the block wall.
Note:Â Try HEPA vacuuming, air blasting, or adding a anti-microbial solution to clean these building materials.
[/et_pb_text][/et_pb_column][et_pb_column type=”1_2″][et_pb_image admin_label=”Image” src=”https://funguyinspections.com/wp-content/uploads/2017/01/20150926_081113-e1485411219367.jpg” alt=”mold removal sealants” show_in_lightbox=”off” url_new_window=”off” animation=”left” sticky=”off” align=”left” force_fullwidth=”on” always_center_on_mobile=”on” use_border_color=”on” border_color=”#ffffff” border_width=”15px” border_style=”solid”] [/et_pb_image][/et_pb_column][/et_pb_row][et_pb_row admin_label=”Row”][et_pb_column type=”1_2″][et_pb_text admin_label=”Text” background_layout=”light” text_orientation=”left” text_font_size=”14″ use_border_color=”off” border_color=”#ffffff” border_style=”solid”]
Extreme mold remediation
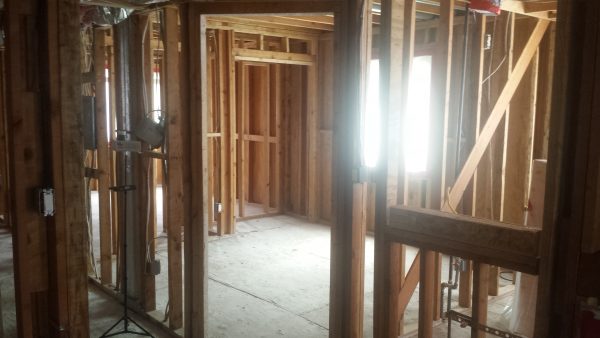
This extreme remediation was completed by a certified mold removal company. All the drywall was removed from this condo because of the extreme water damage and mold.
Note:Â When in doubt, take it out!
[/et_pb_text][/et_pb_column][et_pb_column type=”1_2″][et_pb_image admin_label=”Image” src=”https://funguyinspections.com/wp-content/uploads/2017/01/20160726_135306-e1485672410764.jpg” alt=”mold removal sealants” show_in_lightbox=”off” url_new_window=”off” animation=”left” sticky=”off” align=”left” force_fullwidth=”on” always_center_on_mobile=”on” use_border_color=”on” border_color=”#ffffff” border_width=”15px” border_style=”solid”] [/et_pb_image][/et_pb_column][/et_pb_row][et_pb_row admin_label=”row”][et_pb_column type=”4_4″][et_pb_cta admin_label=”Call To Action” url_new_window=”off” button_text=”Learn More today” use_background_color=”on” background_color=”rgba(224,224,224,0.83)” background_layout=”light” text_orientation=”left” header_font_size=”26″ body_font_size=”14″ use_border_color=”off” border_color=”#ffffff” border_style=”solid” custom_button=”off” button_text_size=”20″ button_border_width=”2″ button_border_radius=”3″ button_letter_spacing=”0″ button_use_icon=”default” button_icon_placement=”right” button_on_hover=”on” button_border_radius_hover=”3″ button_letter_spacing_hover=”0″]
Post Remediation Mold Inspection & Sampling Certificates
[/et_pb_cta][/et_pb_column][/et_pb_row][et_pb_row admin_label=”Row”][et_pb_column type=”1_2″][et_pb_text admin_label=”Text” background_layout=”light” text_orientation=”left” text_font_size=”14″ use_border_color=”off” border_color=”#ffffff” border_style=”solid”]
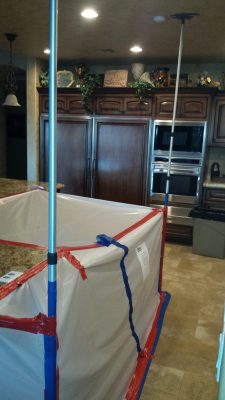
Supporting Containments
Take the time to use painter poles or extra tape to secure your containment to the building. This will prevent the containment from falling to the floor.
Note: Testing small enclosures becomes a bit tricky. Try not to make the enclosure too small.
[/et_pb_text][/et_pb_column][et_pb_column type=”1_2″][et_pb_image admin_label=”Image” src=”https://funguyinspections.com/wp-content/uploads/2017/01/20151106_162452-e1485672742350.jpg” show_in_lightbox=”off” url_new_window=”off” animation=”left” sticky=”off” align=”center” force_fullwidth=”off” always_center_on_mobile=”on” use_border_color=”off” border_color=”#ffffff” border_style=”solid”] [/et_pb_image][/et_pb_column][/et_pb_row][et_pb_row admin_label=”Row”][et_pb_column type=”1_2″][et_pb_text admin_label=”Text” background_layout=”light” text_orientation=”left” text_font_size=”14″ use_border_color=”off” border_color=”#ffffff” border_style=”solid”]
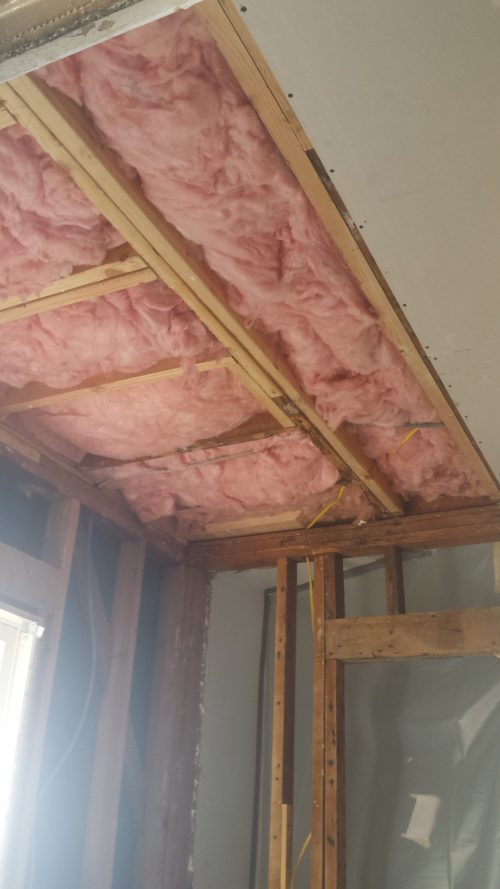
Insulation – Porous item
Mold removal guides from the EPA, IICRC, and the Los Angeles Guides for mold remediation dictate that porous materials, such as insulation, be removed from the structure.
Note:Â Insulation should be bagged and thrown away as normal refuse.
[/et_pb_text][/et_pb_column][et_pb_column type=”1_2″][et_pb_image admin_label=”Image” src=”https://funguyinspections.com/wp-content/uploads/2017/01/20151112_132159-e1485444310657.jpg” show_in_lightbox=”off” url_new_window=”off” animation=”left” sticky=”off” align=”center” force_fullwidth=”off” always_center_on_mobile=”on” use_border_color=”off” border_color=”#ffffff” border_style=”solid”] [/et_pb_image][/et_pb_column][/et_pb_row][et_pb_row admin_label=”Row”][et_pb_column type=”1_2″][et_pb_text admin_label=”Text” background_layout=”light” text_orientation=”left” text_font_size=”14″ use_border_color=”off” border_color=”#ffffff” border_style=”solid”]
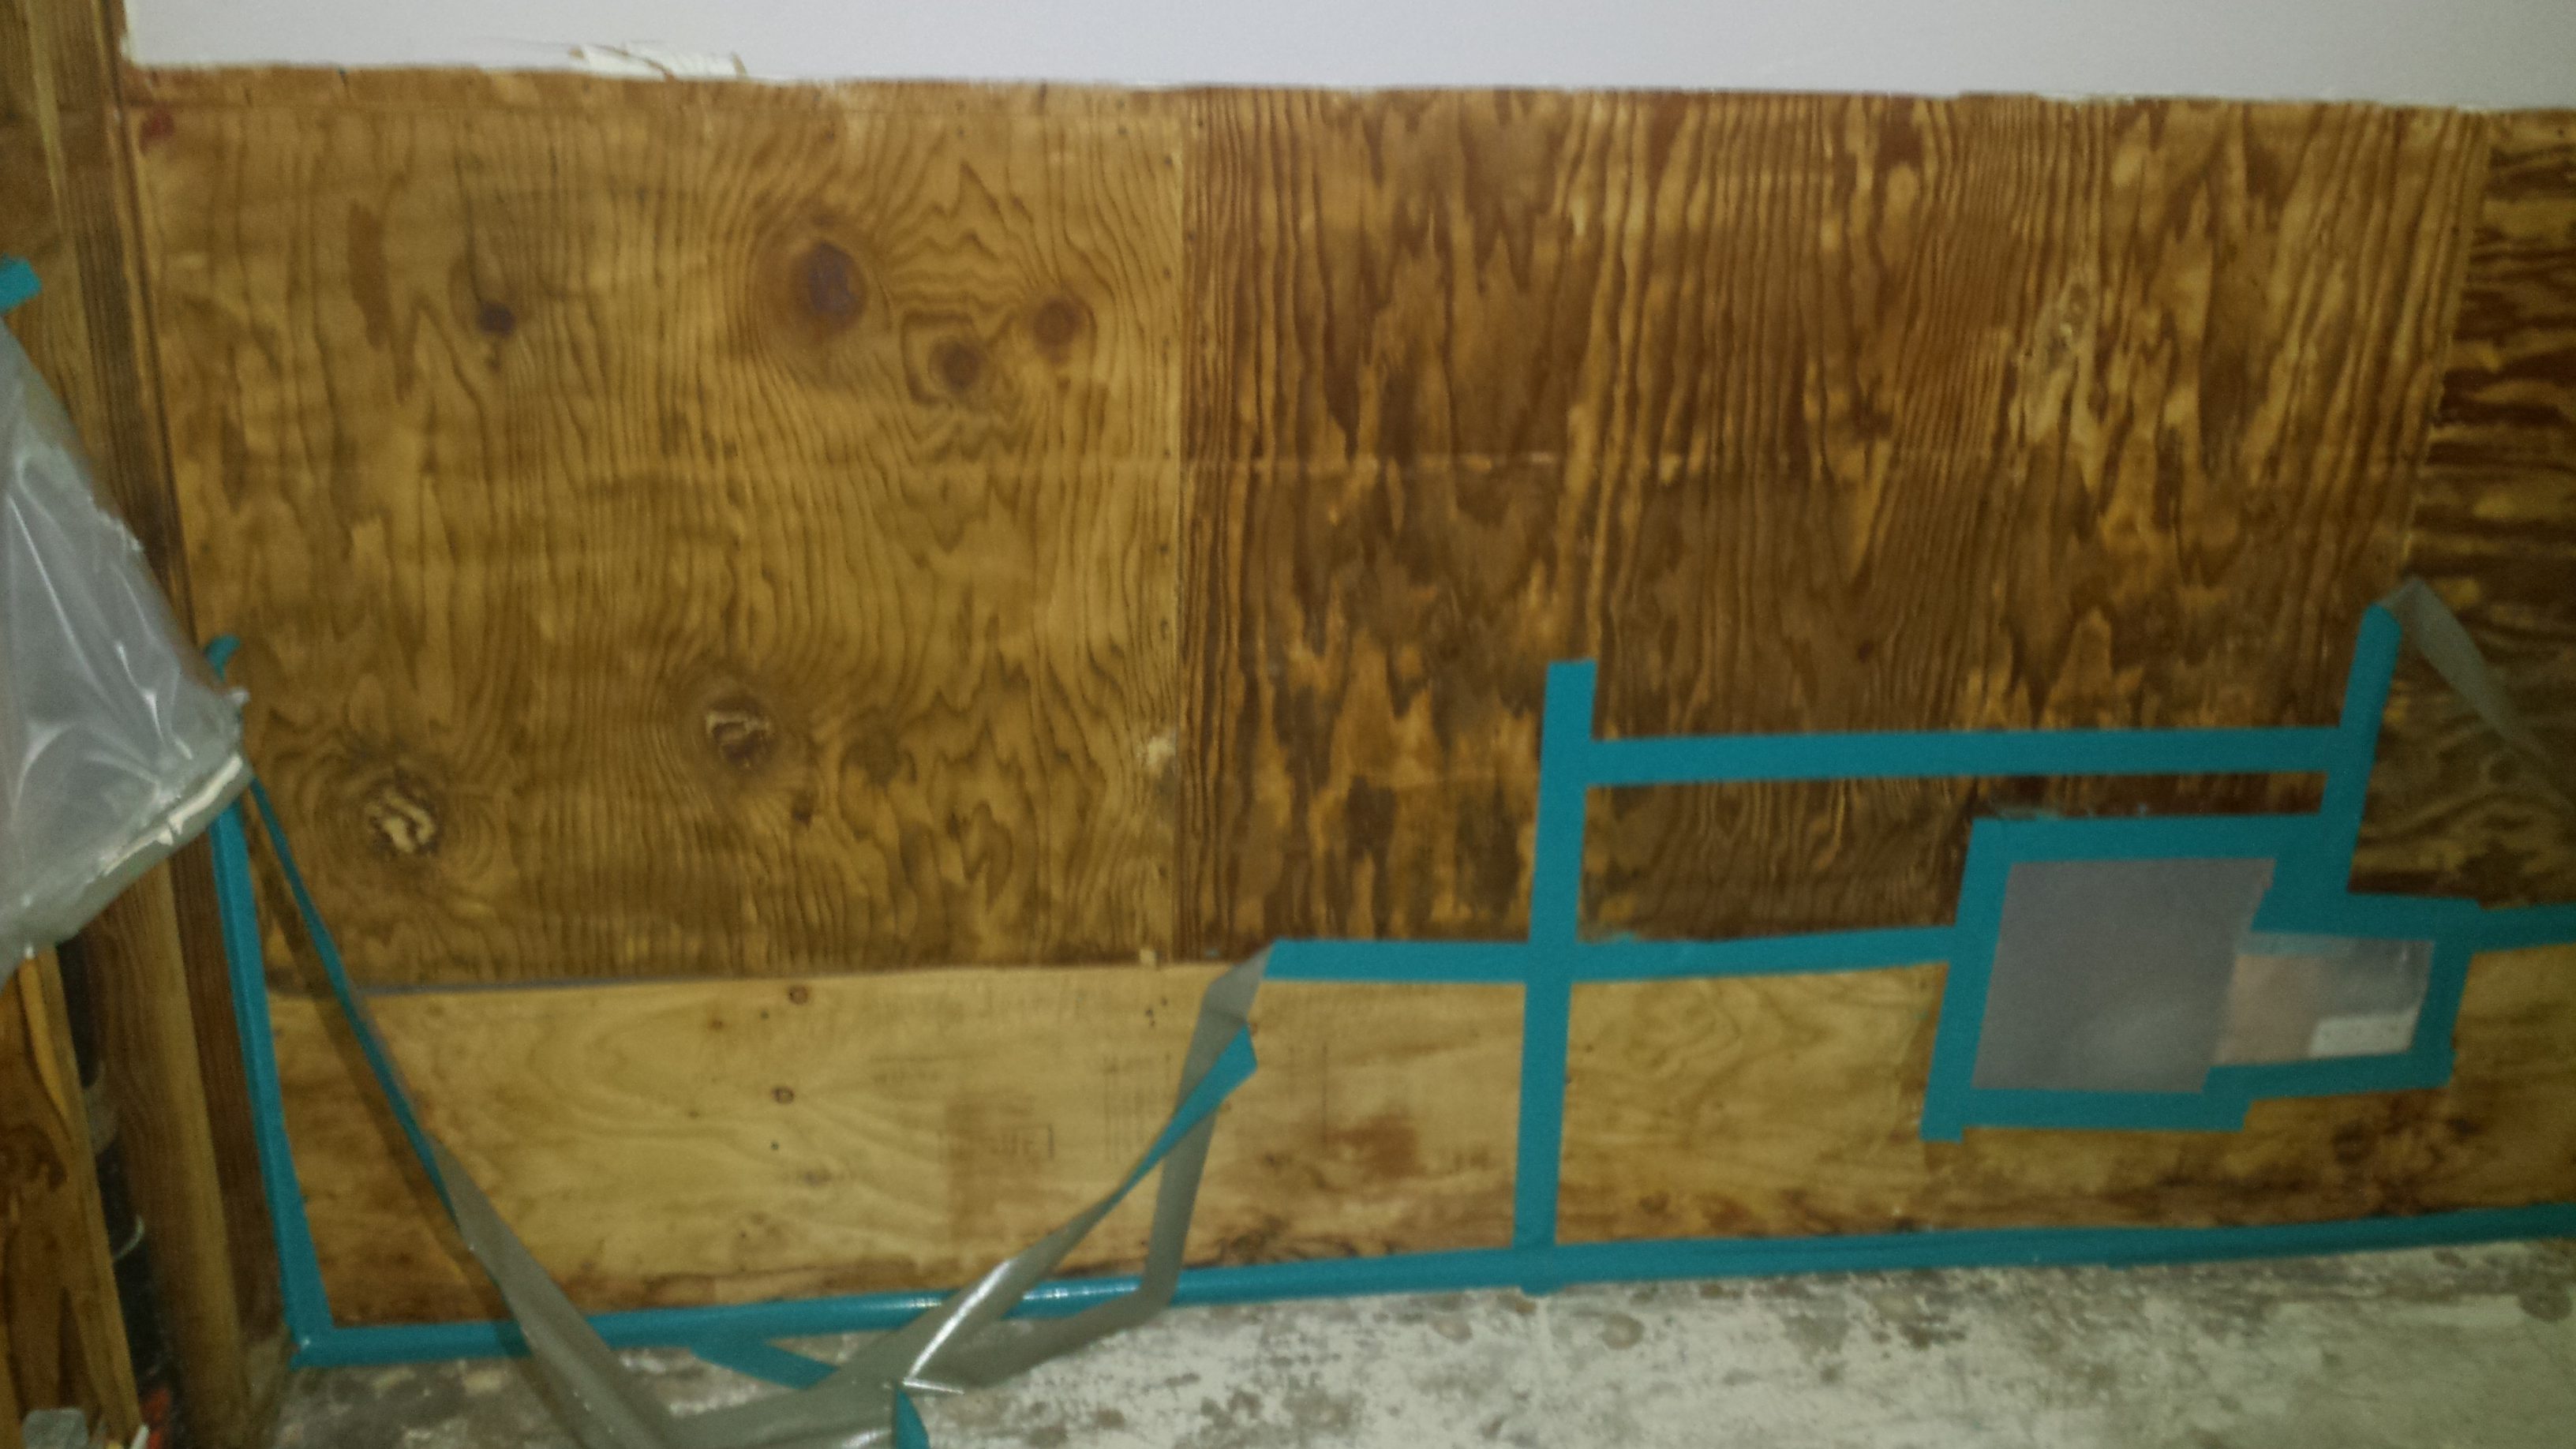
Tape the seams between plywood
Mold removal companies will have their technicians tape the seams between the plywood.  This is usually completed to prevent air from moving into the containment from other areas.
Note:Â Mold Inspectors will remove tape to view the areas that were cleaned..
[/et_pb_text][/et_pb_column][et_pb_column type=”1_2″][et_pb_image admin_label=”Image” src=”https://funguyinspections.com/wp-content/uploads/2017/01/20151125_151721-e1485444758516.jpg” show_in_lightbox=”off” url_new_window=”off” animation=”left” sticky=”off” align=”center” force_fullwidth=”off” always_center_on_mobile=”on” use_border_color=”off” border_color=”#ffffff” border_style=”solid”] [/et_pb_image][/et_pb_column][/et_pb_row][et_pb_row admin_label=”Row”][et_pb_column type=”1_2″][et_pb_text admin_label=”Text” background_layout=”light” text_orientation=”left” text_font_size=”14″ use_border_color=”off” border_color=”#ffffff” border_style=”solid”]
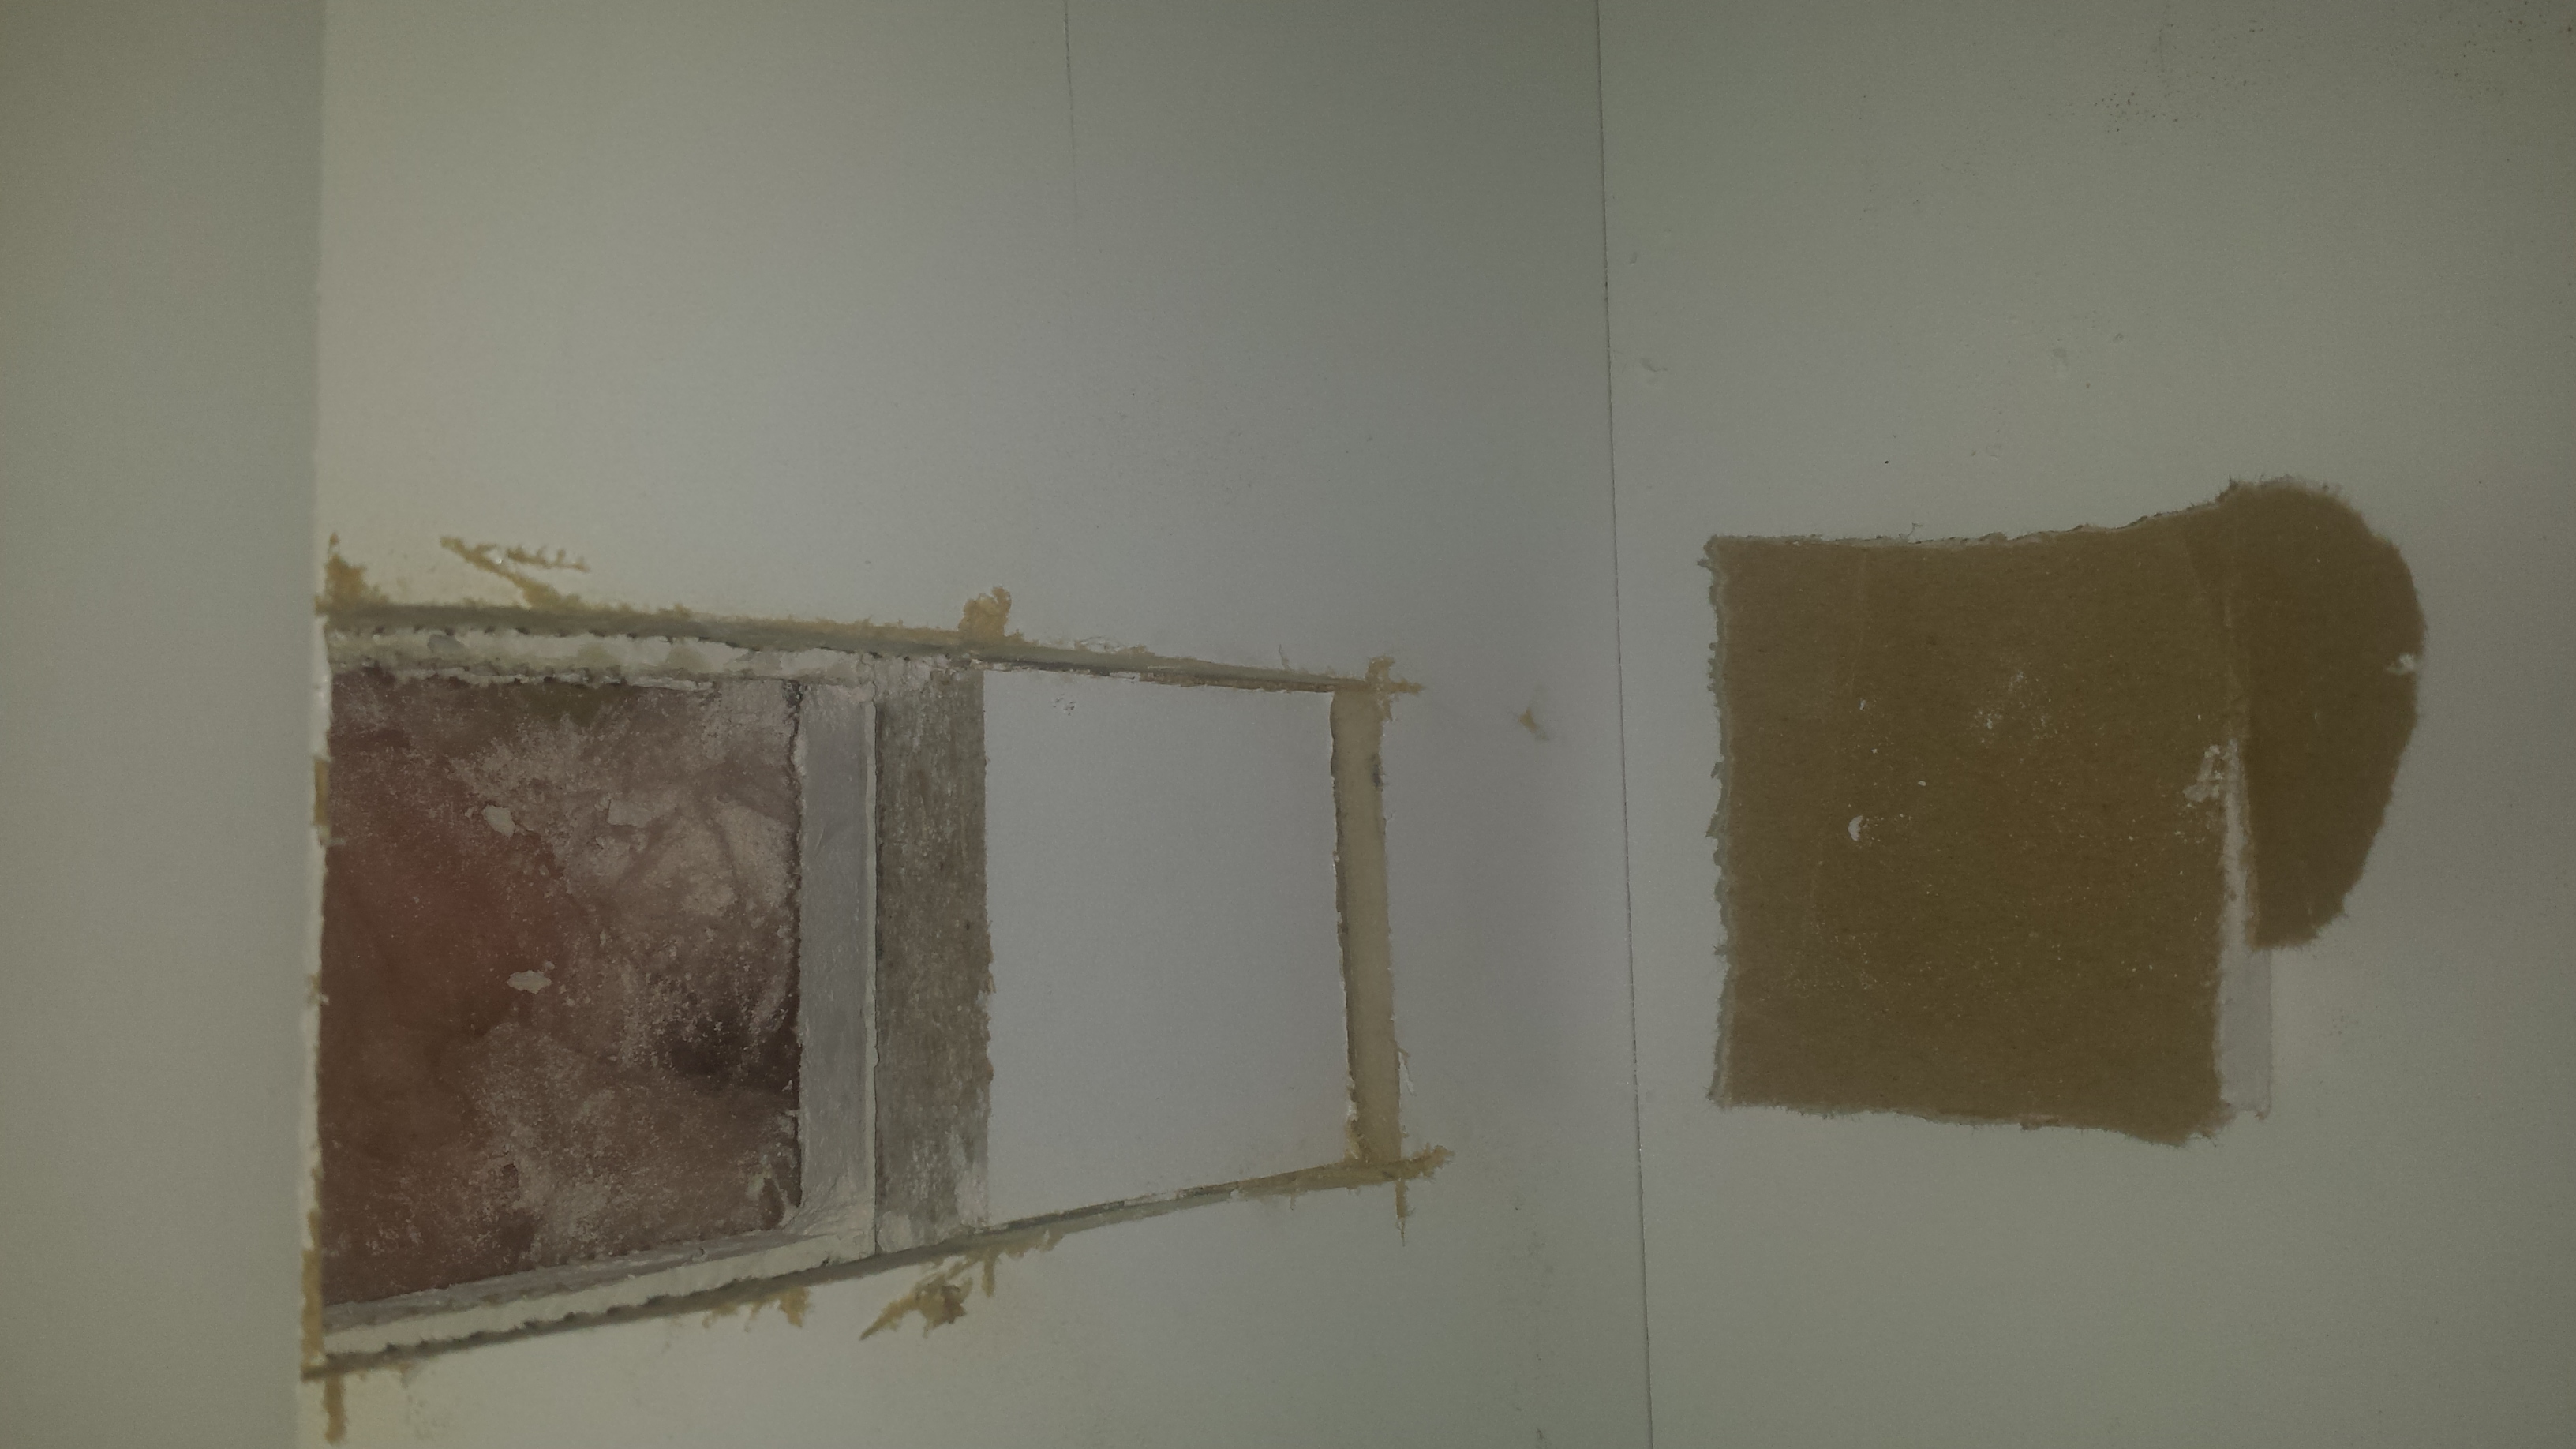
Cut & Investigate walls
Mold inspectors and remediators usually cut into the surface of the wall to determine if mold or water damage can be found below the surface.
Note:Â This cut does not have to be big, approximately 4″ x 4″.
[/et_pb_text][/et_pb_column][et_pb_column type=”1_2″][et_pb_image admin_label=”Image” src=”https://funguyinspections.com/wp-content/uploads/2017/01/20151231_115237.jpg” show_in_lightbox=”off” url_new_window=”off” animation=”left” sticky=”off” align=”center” force_fullwidth=”off” always_center_on_mobile=”on” use_border_color=”off” border_color=”#ffffff” border_style=”solid”] [/et_pb_image][/et_pb_column][/et_pb_row][et_pb_row admin_label=”Row”][et_pb_column type=”1_2″][et_pb_text admin_label=”Text” background_layout=”light” text_orientation=”left” text_font_size=”14″ use_border_color=”off” border_color=”#ffffff” border_style=”solid”]
DeContamination Chambers
A decontamination chamber should be used during the process of mold removal. The construction of the passage way allows workers to clean materials, remove protective clothing, and allow for a secondary doorway that protects the occupants from the dust debris, and mold spores.
Note:Â The decontamination chamber – typically made of pvc piping the frame of the chamber is then covered with plastic and taped into place.
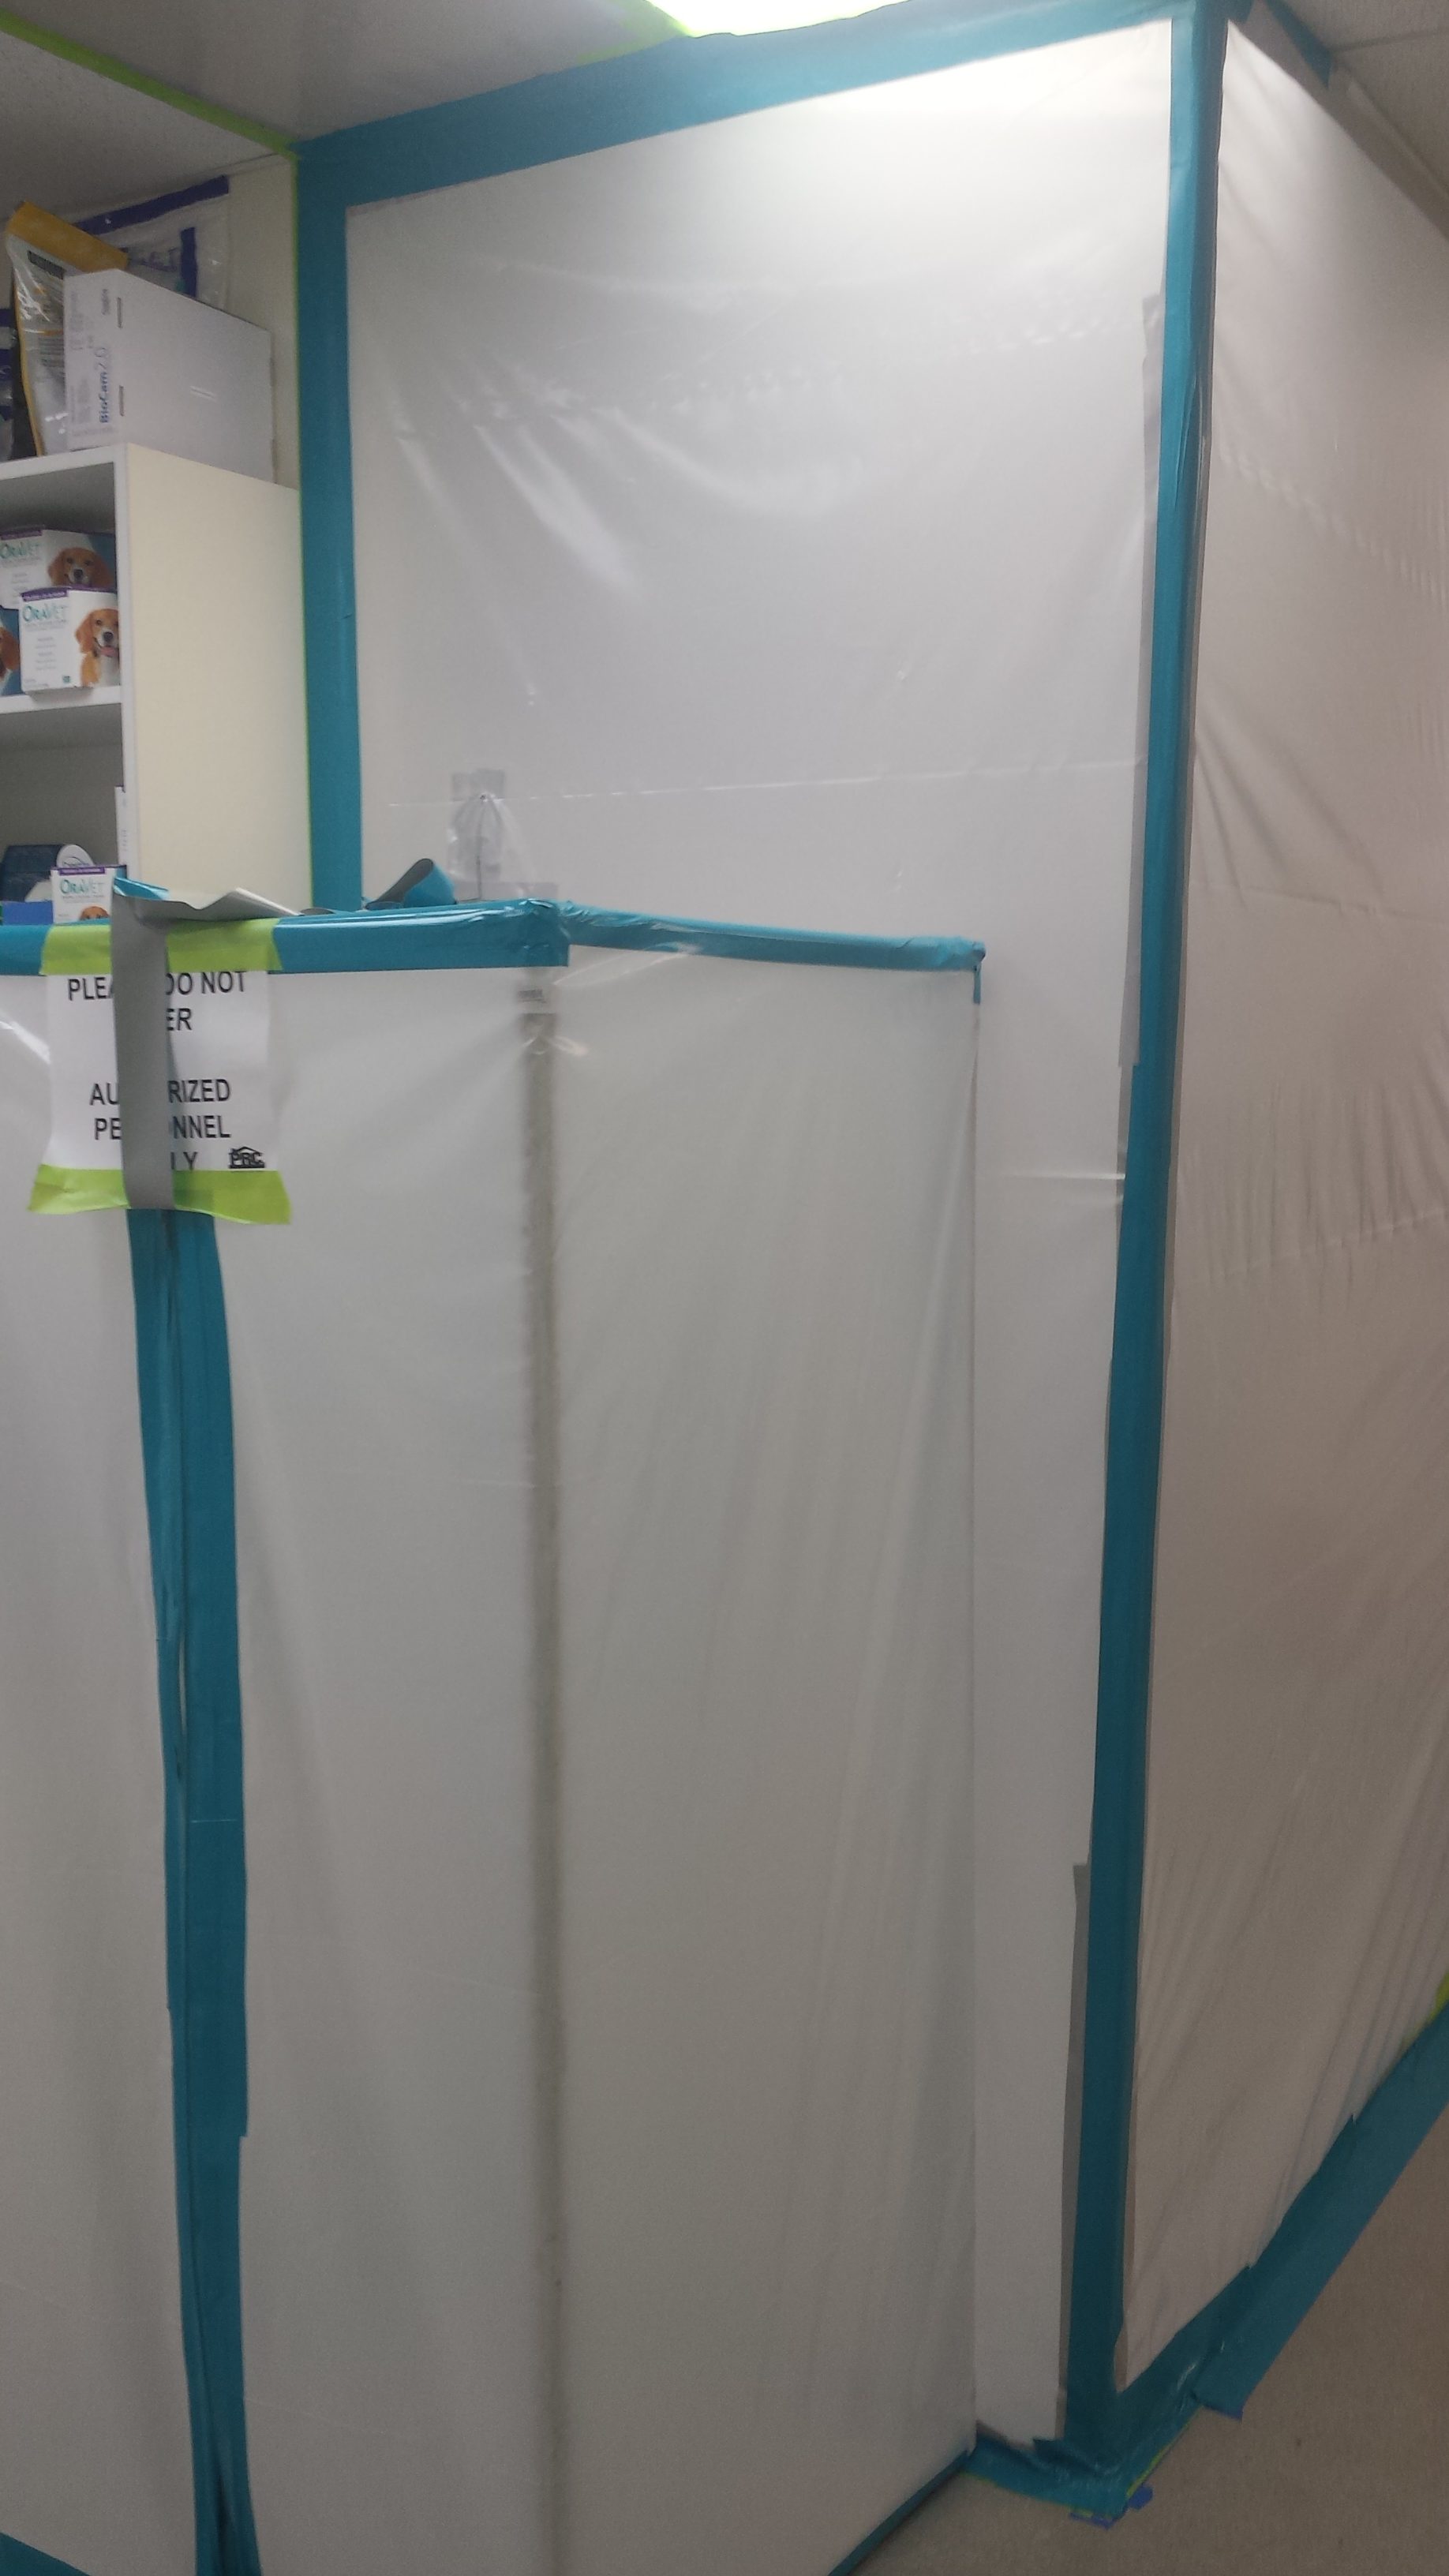
[/et_pb_text][/et_pb_column][et_pb_column type=”1_2″][et_pb_image admin_label=”Image” src=”https://funguyinspections.com/wp-content/uploads/2017/01/20160707_121328-e1485667229397.jpg” show_in_lightbox=”off” url_new_window=”off” animation=”left” sticky=”off” align=”center” force_fullwidth=”off” always_center_on_mobile=”on” use_border_color=”off” border_color=”#ffffff” border_style=”solid”] [/et_pb_image][/et_pb_column][/et_pb_row][et_pb_row admin_label=”Row”][et_pb_column type=”1_2″][et_pb_text admin_label=”Text” background_layout=”light” text_orientation=”left” text_font_size=”14″ use_border_color=”off” border_color=”#ffffff” border_style=”solid”]
Drilling holes to Maximize Air Flow ~
Drilling holes in building materials will pass air over, threw, and into the wet building materials and help prevent mold growth. Drill holes in cabinet bases, wall cavities, and furniture to move fresh air over the materials until dry.
Note: 1/2″ holes are usually adequate. Some contractors may use 1″-2″ hole cut to maximize air flow around the building materials.
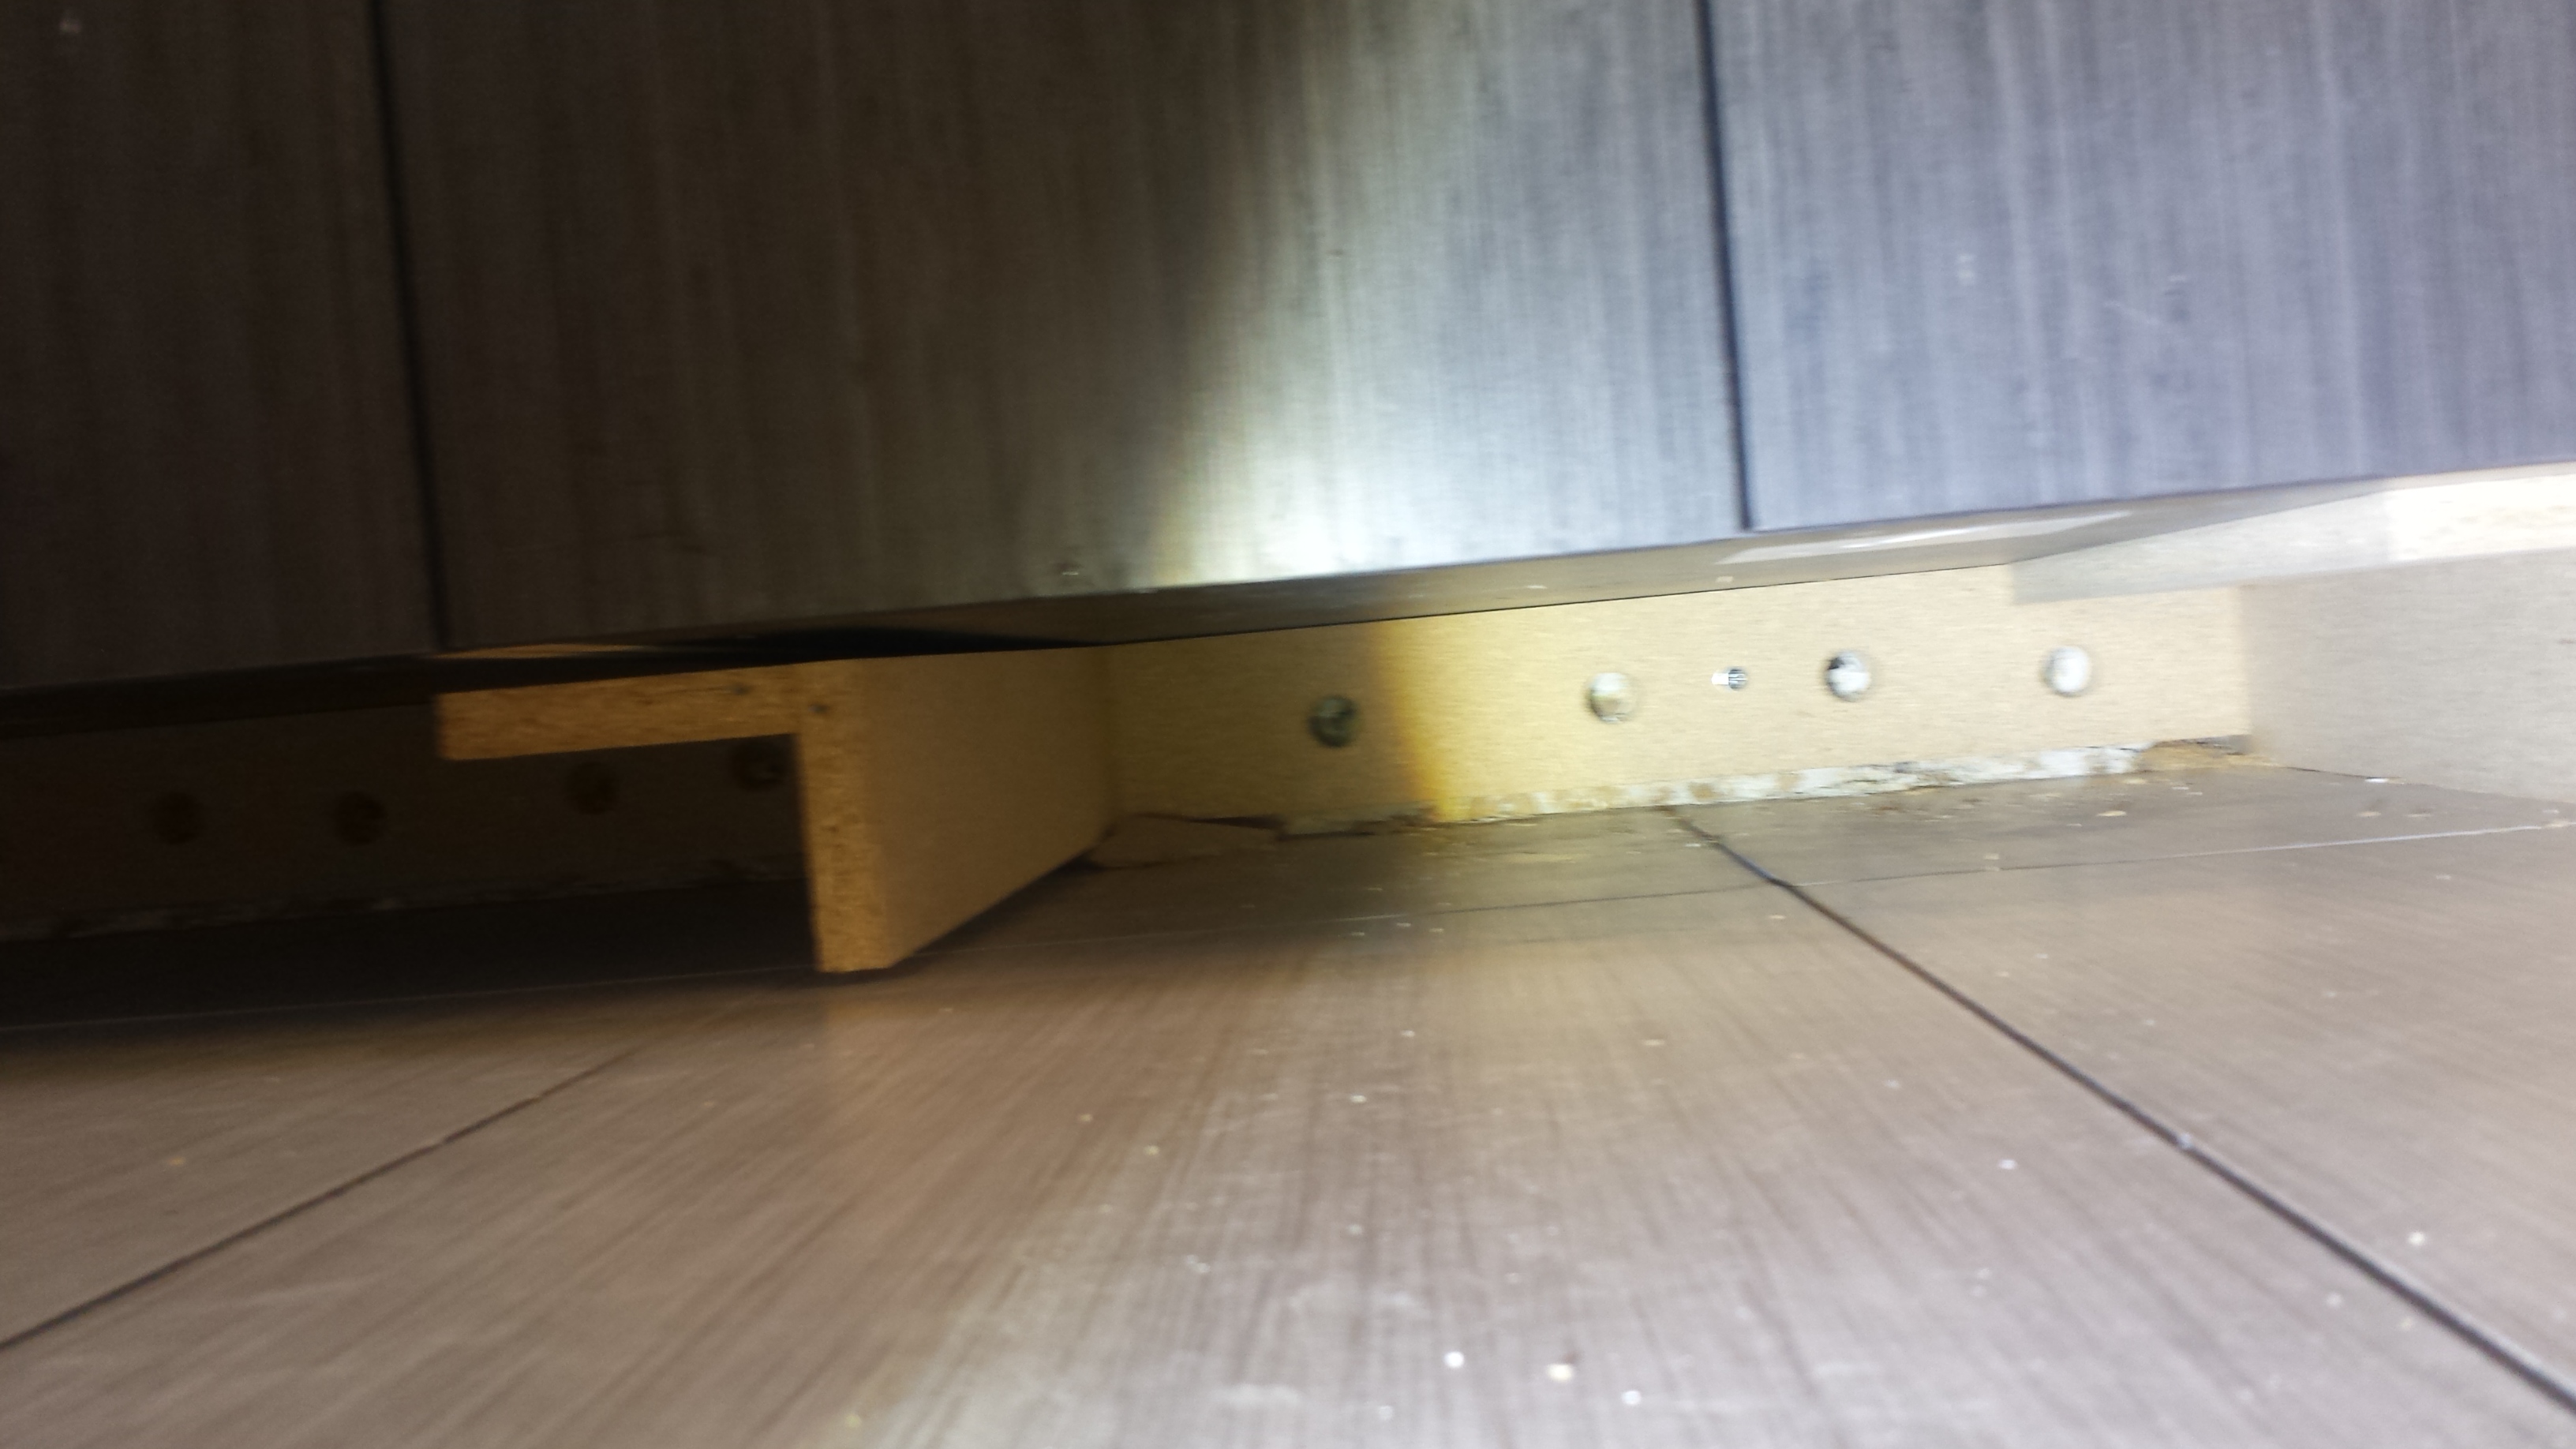
[/et_pb_text][/et_pb_column][et_pb_column type=”1_2″][et_pb_image admin_label=”Image” src=”https://funguyinspections.com/wp-content/uploads/2017/01/20160630_141149.jpg” show_in_lightbox=”off” url_new_window=”off” animation=”left” sticky=”off” align=”center” force_fullwidth=”off” always_center_on_mobile=”on” use_border_color=”off” border_color=”#ffffff” border_style=”solid”] [/et_pb_image][/et_pb_column][/et_pb_row][et_pb_row admin_label=”Row”][et_pb_column type=”1_2″][et_pb_text admin_label=”Text” background_layout=”light” text_orientation=”left” text_font_size=”14″ use_border_color=”off” border_color=”#ffffff” border_style=”solid”]
White Mold Encapsulants
White mold encapsulants are most commonly used to seal the surface of the building materials. Try using a clear coat encapsulant to seal the materials instead.
Note: Mold Inspectors may fail an inspection if building materials are painted with a white mold encapsulants. Consult your industrial hygienist prior to application for approval before post remediation testing and verification.
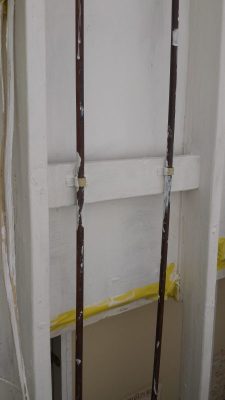
[/et_pb_text][/et_pb_column][et_pb_column type=”1_2″][et_pb_image admin_label=”Image” src=”https://funguyinspections.com/wp-content/uploads/2017/01/20160705_120420-e1485670032314.jpg” show_in_lightbox=”off” url_new_window=”off” animation=”left” sticky=”off” align=”center” force_fullwidth=”off” always_center_on_mobile=”on” use_border_color=”off” border_color=”#ffffff” border_style=”solid”] [/et_pb_image][/et_pb_column][/et_pb_row][et_pb_row admin_label=”Row”][et_pb_column type=”1_2″][et_pb_text admin_label=”Text” background_layout=”light” text_orientation=”left” text_font_size=”14″ use_border_color=”off” border_color=”#ffffff” border_style=”solid”]
Cover Drains
When applicable cover the drain pipes within the mold remediation area during your mold removal.
Note:Â Plastic and tape, a rag, and even a hard plastic PVC cap will help prevent sewer odors from escaping.
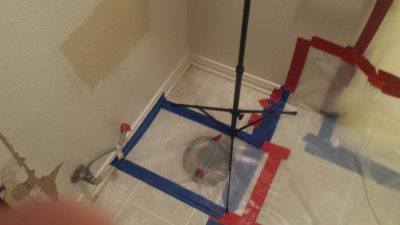
[/et_pb_text][/et_pb_column][et_pb_column type=”1_2″][et_pb_image admin_label=”Image” src=”https://funguyinspections.com/wp-content/uploads/2017/01/20160630_091558-e1485674638114.jpg” show_in_lightbox=”off” url_new_window=”off” animation=”left” sticky=”off” align=”center” force_fullwidth=”off” always_center_on_mobile=”on” use_border_color=”off” border_color=”#ffffff” border_style=”solid”] [/et_pb_image][/et_pb_column][/et_pb_row][et_pb_row admin_label=”Row”][et_pb_column type=”1_2″][et_pb_text admin_label=”Text” background_layout=”light” text_orientation=”left” text_font_size=”14″ use_border_color=”off” border_color=”#ffffff” border_style=”solid”]
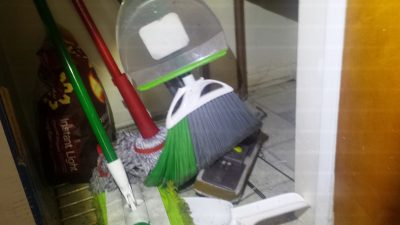
Cleaning Equipment
What type of cleaning equipment are you using with your mold removal? Be aware of dirty equipment. This may contaminate your clean work space.
Note: Be sure to clean all your equipment prior to bringing it into another work area. BTW, Swiffers are a good way to clean the floor during your final wipe down.
[/et_pb_text][/et_pb_column][et_pb_column type=”1_2″][et_pb_image admin_label=”Image” src=”https://funguyinspections.com/wp-content/uploads/2017/01/20160630_103552-e1485675093178.jpg” show_in_lightbox=”off” url_new_window=”off” animation=”left” sticky=”off” align=”center” force_fullwidth=”off” always_center_on_mobile=”on” use_border_color=”off” border_color=”#ffffff” border_style=”solid”] [/et_pb_image][/et_pb_column][/et_pb_row][et_pb_row admin_label=”Row”][et_pb_column type=”1_2″][et_pb_text admin_label=”Text” background_layout=”light” text_orientation=”left” text_font_size=”14″ use_border_color=”off” border_color=”#ffffff” border_style=”solid”]
Cleaning Equipment
What type of cleaning equipment are you using with your mold removal? Be aware of dirty equipment. This may contaminate your clean work space.
Note: Be sure to clean all your equipment prior to bringing it into another work area. BTW, Swiffers are a good way to clean the floor during your final wipe down.
[/et_pb_text][/et_pb_column][et_pb_column type=”1_2″][et_pb_image admin_label=”Image” src=”https://funguyinspections.com/wp-content/uploads/2017/01/20160627_091704-e1485707311688.jpg” show_in_lightbox=”off” url_new_window=”on” animation=”left” sticky=”off” align=”center” force_fullwidth=”off” always_center_on_mobile=”on” use_border_color=”off” border_color=”#ffffff” border_style=”solid” alt=”Exterior containments can be made to create a seamless enclosure. Be sure to use enough tape to hold the plastic into place.”] [/et_pb_image][/et_pb_column][/et_pb_row][et_pb_row admin_label=”Row”][et_pb_column type=”1_2″][et_pb_text admin_label=”Text” background_layout=”light” text_orientation=”left” text_font_size=”14″ use_border_color=”off” border_color=”#ffffff” border_style=”solid”]
Cleaning Equipment
What type of cleaning equipment are you using with your mold removal? Be aware of dirty equipment. This may contaminate your clean work space.
Note: Be sure to clean all your equipment prior to bringing it into another work area. BTW, Swiffers are a good way to clean the floor during your final wipe down.
[/et_pb_text][/et_pb_column][et_pb_column type=”1_2″][et_pb_image admin_label=”Image” src=”https://funguyinspections.com/wp-content/uploads/2017/01/20160627_091704-e1485707311688.jpg” show_in_lightbox=”off” url_new_window=”on” animation=”left” sticky=”off” align=”center” force_fullwidth=”off” always_center_on_mobile=”on” use_border_color=”off” border_color=”#ffffff” border_style=”solid” alt=”Exterior containments can be made to create a seamless enclosure. Be sure to use enough tape to hold the plastic into place.”] [/et_pb_image][/et_pb_column][/et_pb_row][et_pb_row admin_label=”row”][et_pb_column type=”4_4″][/et_pb_column][/et_pb_row][et_pb_row admin_label=”row”][et_pb_column type=”4_4″][/et_pb_column][/et_pb_row][et_pb_row admin_label=”row”][et_pb_column type=”4_4″][/et_pb_column][/et_pb_row][/et_pb_section]